
Making squashes with various fruits has become a usual summer time activity at home. They are easy to make and much better by taste and for health when compared to the store bought ones.
Lemon squash is the easiest to make. The squash is so versatile that you can add it up to any other juice to get the lemoney flavor. It makes life so easy when you want to make ice lemon tea etc.
Gulp Gulp Gulp.. Lemon is such a humble little fruit that gives you so much flavor and taste. :)
Check my other squashes too :
Grape squash
Hibiscus squash
Mango squash

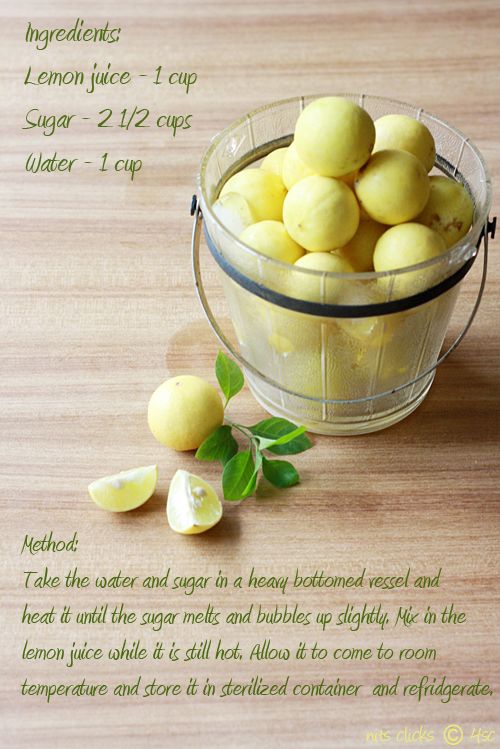
Ingredients:
Lemon juice - 1 cup
Sugar - 2 1/2 cups
Water - 1 cup
Lemon juice - 1 cup
Sugar - 2 1/2 cups
Water - 1 cup

Method:
Take the water and sugar in a heavy bottomed vessel and heat it until the sugar melts and bubbles up slightly. Switch off the stove.
Pour the lemon juice while the sugar syrup is hot and mix it well.
Lemon squash is ready. Allow it to come to room temperature and store it in sterilized container.
You can store this is fridge and use it upto one year.

To make lemon juice:
Take the serving glass and fill in 1/4 with lemon squash and rest with chill water. Stir well and serve :)
Tips:
Use the same syrup for making ice lemon tea. Add a tsp of tea powder to 3 tblsp water and allow it to boil. Strain and mix it with 1 glass of lemon juice made above. Add some honey for extra taste :)
Take the serving glass and fill in 1/4 with lemon squash and rest with chill water. Stir well and serve :)

Tips:
Use the same syrup for making ice lemon tea. Add a tsp of tea powder to 3 tblsp water and allow it to boil. Strain and mix it with 1 glass of lemon juice made above. Add some honey for extra taste :)


 Fondant Cakes
 Side Dishes (Subzi/Chutney)
 Lunch
Lunch Salads
 Chaat Items
 Sweets
 Product Review
 Kids Special
 Color Mania
 Mango Mood


Fondant Cakes - 1
Fondant Cakes - 2
Fondant Cakes - 3
Fondant Cakes - 4