Sunday, July 2, 2017

Red Velvet Cupcakes With Cream Cheese Frosting


Helloooo Readers, It has been really Really REALLY long since I did a blog post and trust me I have always wanted to get back to blogging but somehow life kept me very busy and just couldn't give the devotion that I did earlier. But my readers and dear friends who know me really well, consistently kept asking me to get back to blogging and said how they missed reading my posts. Well, obligating to it in a very happy mood today :)

On my favorite and fresh Monday morning I decided to get back to blogging in a tiny teeny way with this sweet post. Its going to be the vibrant and delicious Red Velvet cake with cream cheese frosting :) Yay!!

The Red velvet cake originally got its color due to the presence of natural element called anthocyanin found in the cocoa powder which reacts to addition of an alkali and turns it red. Sadly the cocoa powder we get these days are way too processed so they don't turn red naturally. Hence we use a lot of food color to it to make these cuppies red.

The red color and the velvety texture of this cake along with the creamy and slightly salty cream cheese frosting makes it stand out of the crowd.

Red velvet cake symbolizes love and here it is for my love for blogging :)


Ingredients:

Sugar - 250 gms
Butter - 113 gms
Butter milk - 240 gms (Regular milk 230 gms + 10 gms of vinegar)
Egg - 2 nos
Flour - 250 gms
Salt - 2 gms
Cocoa powder - 15 gms
Vinegar - 5 gms
Cooking soda - 5 gms
Red food color - As desired

Cream cheese frosting:

Whipping cream - 100 gms
Cream cheese - 50 gms


Method:

Measure milk and add vinegar to it to make the butter milk. Mix well and allow it to curdle. Add the food color to the mixture and mix until well dissolved.

Cream butter and sugar together until pale and creamy. Add one egg at a time and beat well until well incorporated.

Now add the butter milk mixture little by little to the creamed butter and beat well. Do this process until the whole butter milk mixture is used up. At this stage the batter might look curdled but don't worry as you add in the dry ingredients, they would get back to normal batter consistency and look.

Measure the maida, cocoa powder and salt together. Now fold these dry ingredients into the above mixture gently. Mix it gently to form a smooth batter without lumps.

Finally mix the baking soda and the vinegar in a small bowl and mix it well. The mixture will bubble up, quickly add it to the batter and mix it well.

Preheat the oven to 170 degree Celsius.  Line the cupcake tray with liners.

Pour in the above made batter to 2/3rd of the cups. Bake them in the middle rack for about 18-25 mins. Check if done by poking a tooth pick into the cupcake.

Allow it to cool down completely on a wire rack.

Cream cheese frosting:

Take non dairy whipping cream in a beater bowl and whip until stiff peaks.

Fold in room temperature cream cheese to the whipped cream.

Use this frosting on the cupcakes and sprinkle cake crumbs for decoration :)


Written by: Nithya
Send in your queries by clicking here


Wednesday, November 11, 2015

Happy Diwali!


Wish all my friends, readers and co-bloggers a very happy Diwali! :D

Oops I just realized that it has been a year and a half since I wrote my last blog post! My sincere apology to you all for have been missing for quite sometime. I have been cooking, eating out, trying new stuff, learning each day, taking orders and going through much more and so on. I was alive and kicking but sorry for have not been active with this blogging passion of mine. With this post on an auspicious day I would like to get back to my identity, my blog again :)  Not sure or not promising anything but the eagerness to get in touch with 4th Sense Cooking is back :)


Wishing you all again with a visual treat of my Diwali cupcake hampers that I made this year for a client! :)


Thursday, July 31, 2014

More Fondant Cake Creations from Me


There is no looking back ever since I took up orders for Fondant theme based cakes! I am totally loving the experience of making each and every cake and the lovely themes that are coming up :)Any day can be made special with such lovely cakes! :)


Yes! This is the reason I am not able to blog much too :( Will try to post recipes soon!


 photo Leocake4_zpse7937efa.jpg

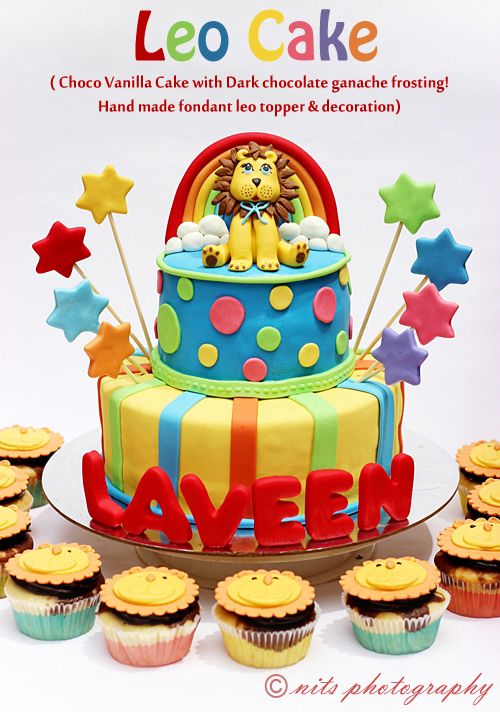
A Leo cake for the little Laveen who rules the planets being the king of the forest 

Some clients are super specific of what they want and it makes the cake artist's work so easy and interesting! Thanks to this client who told me every single detail well in advance 


 photo Tablecake1_zps26511d30.jpg

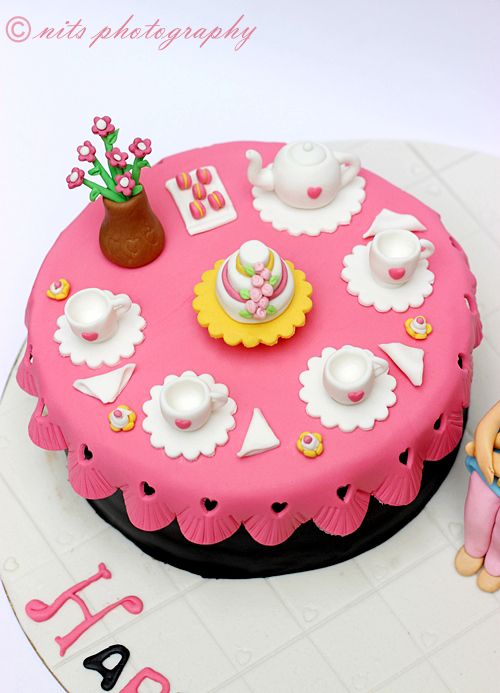
A cake ordered by a loving husband to his sweet wife 

A cute home setup 


 photo Chotabheemcake_zps87d78ebe.jpg

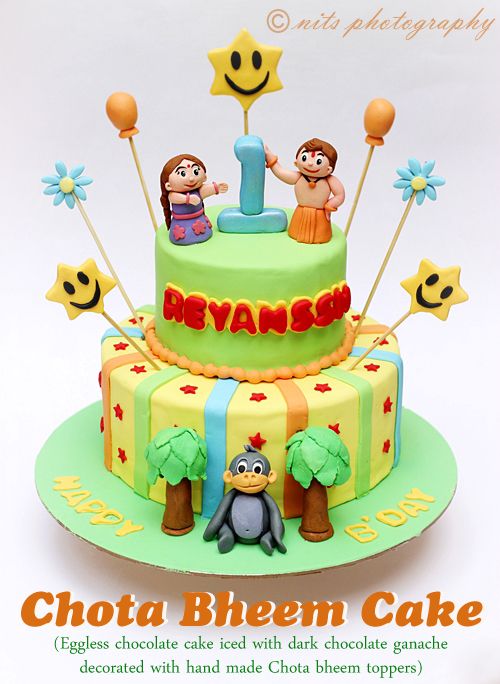
Chota Bheem!!!! Here it is for all the kids who love this cartoon 
Had real tension when I had to make these characters because kids are the best judges and wouldn't agree with anything that doesn't look like their favorite characters 


 photo Junglethemecake1_zps79edcf15.jpg

A peep into the jungle and all the animals get their heads out to wish Karthik a very happy birthday 

Little Karthik was here to pick the cake and the excitement in his eyes were all the praise I could ask for 


 photo Kavyacake_zps720f28ec.jpg

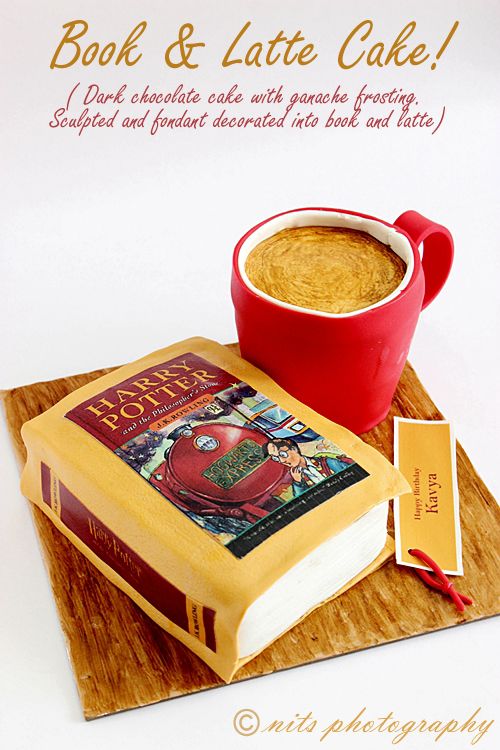
A special cake for my sweetest SIL  She loves books and coffee. She has a big collection of coffee mugs too! So here was my surprise cake for her  

 photo Justmarriedcake3_zps59d02d17.jpg

Just married cake for Prashanth & Samana! 

It was fun making a Janavasam car topper with the couple riding it with joy 


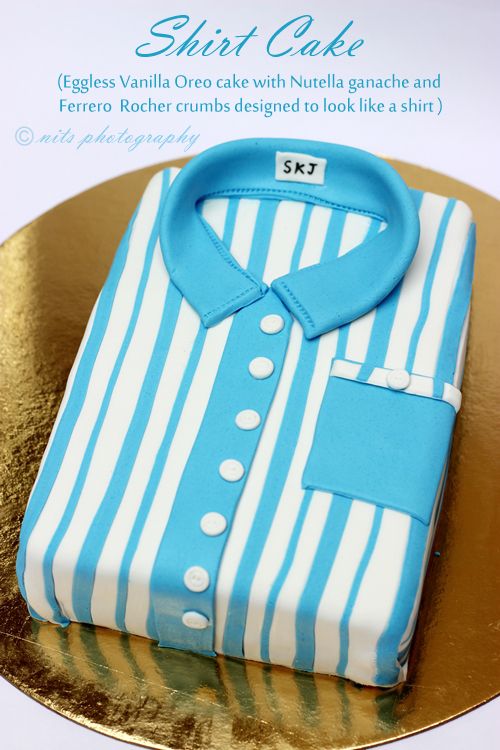
 photo Shirtcake_zpsec4b6ed9.jpg

Made this cake for a man who loves blue and has a big collection of blue striped shirts of all shades 


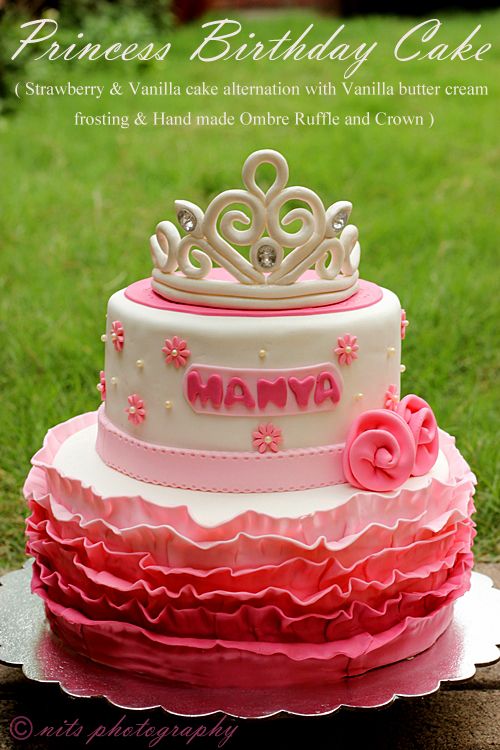
 photo Manyacake2_zpsa0218add.jpg

Princess Manya's Birthday cake 

The cake pattern was mostly derived from birthday girl's party dress with some colors pepped up  And the princess had to wear a crown too  Totally enjoyed making the edible crown 


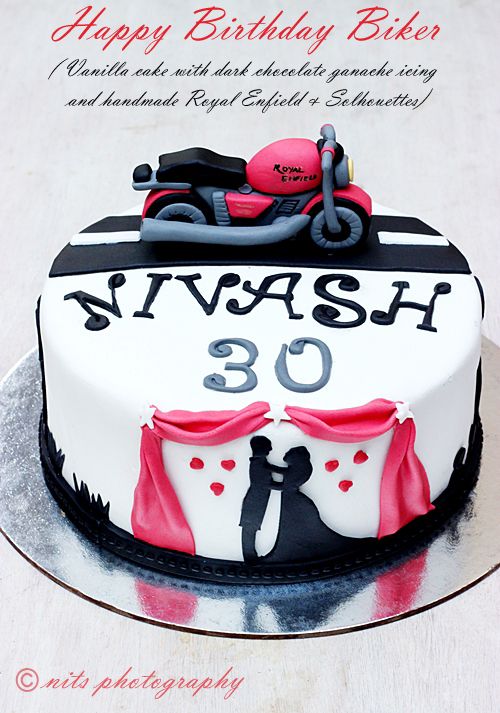
 photo Nivash_zps898b4c11.jpg

I was really thrilled to make this cake for a good buddy of mine. This amazing friend of mine loves Bikes, he is a theater artist and trainer, trekker, a superb MC and loves music and concerts! Hence the cake has it all!
Did I forget!!! He turned 30 years young! and has chosen another best buddy of mine as his life partner! Wish him a super happy long life  

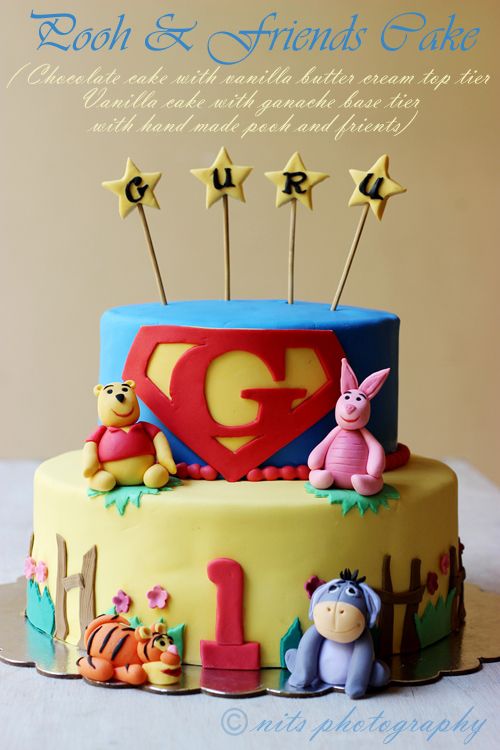
 photo Poohandfriendscakeweb_zpse3ab2a6d.jpg
Master Guru turns one in style 

His mom wanted the little champ to be a super man hence a G for him and pooh and friends were invited to the party to celebrate as well! 


I can help you bring your dream cakes comes true. All you need to do order cakes with me is give me a buzz by mail - fourthsensesamayal@gmail.com or leave me a message in my fb page here - https://www.facebook.com/4thsensecooking with your ideas and I shall try my best to bring it out beautifully for you!

Monday, June 2, 2014

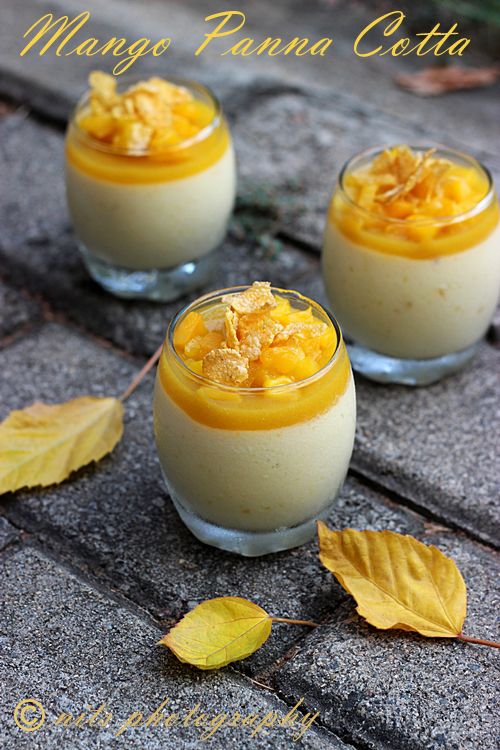
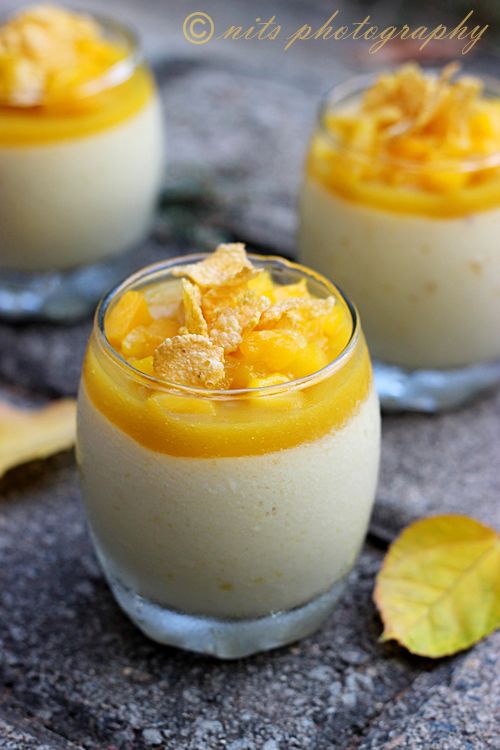
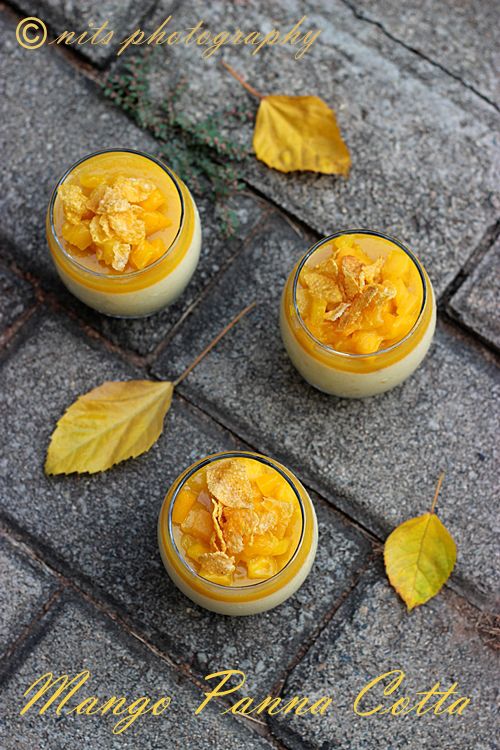
Mango Panna Cotta

 photo Mangopannacotta1_zps9dda9dd5.jpg

Mango mango everywhere and I love to eat them all! :) 

I love mangoes and cant just stop eating them. They dont get boring because of the vast varieties of mangoes available in the market :) Little sour, too sweet, subtle sweet, juicy etc. Though I like to eat it just as it is, the amount of mangoes at home demands me to make something with it to pep it up :)

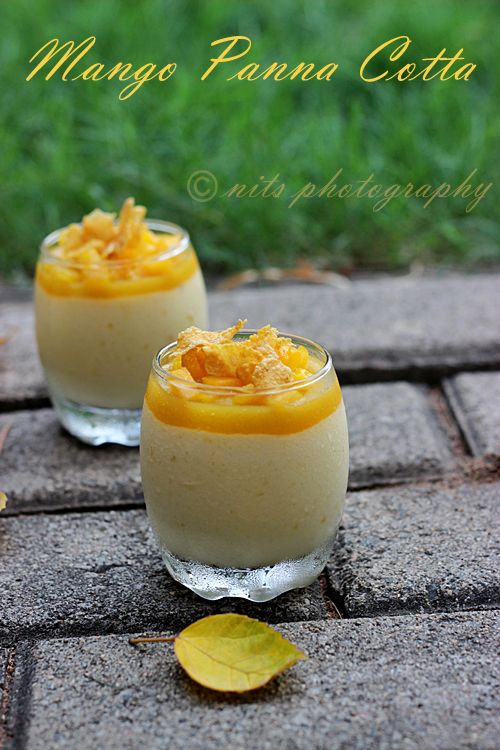
Panna cotta is an Italian dessert with means cooked cream. It is my favorite dessert and when I had mangoes in hand, I quickly came up with version :) Slurp :)

 photo Mangopannacotta_zpsa14d793c.jpg

Ingredients:

Mango puree - 200 gms (1 large mango)
Milk - 100 ml
Sugar - 60 gms
Fresh Cream - 200 ml
Gelatin - 15 gms

 photo Mangopannacotta2_zps4be94441.jpg

Method:

Chop mango into large chunks and puree it in a mixie. 

Take milk, cream and sugar in a heavy bottomed vessel and heat on low flame until it boils. 

Meanwhile take the gelatin in a microwave safe bowl and add 50 gms of water to it and soak it in water for two mins and then microwave it for a minute for it to melt completely. 

Reserve 4 tblsp of mango puree in a bowl and also reserve 1 tblsp of melted gelatin in a separate bowl.

Now add the mango puree to the cream mixture and mix well until it is well blent and smooth. Allow it to cool down a bit. 

Spoon the mango panna cotta into serving glasses or moulds. Set it in the fridge for 2 to 3 hours. 

After a couple of hours mix the reserved mango puree with the reserved gelatin and spoon it over the already set panna cotta to achieve the top mango glee. 

Set it again in the fridge for few hours and serve chill :)

Spoon some chopped mango pieces and corn flakes for crunchiness before serving!

 photo Mangopannacotta3_zps8f605ec7.jpg

Written by: Nithya
Send in your queries by clicking here

Tuesday, May 13, 2014

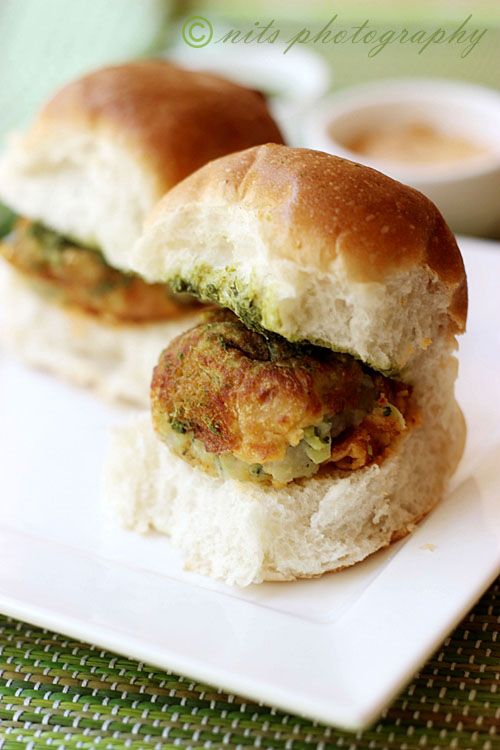
Broccoli Vada Pav

 photo Vadapav_zpse5d6f95c.jpg

Vada pav is the asset of the North! Yup they are the best selling snack or chat any where in North India. I have enjoyed them during my visit to Pune and longing to have them sometime from Mumbai too :)

Ever since my visit to Pune, I have been wanting to make some Vada pavs at home. Browsed loads of recipes but ended up making my own version of it with broccoli addition and guess what, it was a super duper hit too :) My cousins who visited me enjoyed it so much that they wanted the recipe too :P sometimes random cooking brings fame! :P

 photo Vadapav1_zpsc3ebec39.jpg

Ingredients:

Pav buns - 10

For the filling:

Broccoli - 1 
Potato - 3 large
Garlic - 5 pods
Ginger - 1/4 inch piece
Pepper powder - 1 tsp
Jeera powder - 1 tsp
Lemon juice - 1 tsp
Salt - for taste

For the coating:

Besan flour - 1/2 cup
Rice flour - 1/4 cup
Salt - for taste
Chilly powder - for taste
Asafoetida - a pinch

For Green chutney:

Mint leaves - 1 cup
Coriander leaves - 1 cup
Green chillies - 2
Lemon juice - 1 tsp
Garam masala - 1/2 tsp
Salt - for taste

For Red chutney:

Coconut - 1/2 cup
Red chilies - 2
Garlic pods - 4
Tamarind paste - 1 tsp
Salt - for taste

 photo Vadapav4_zpsd780a080.jpg

Method:

To make the filling:

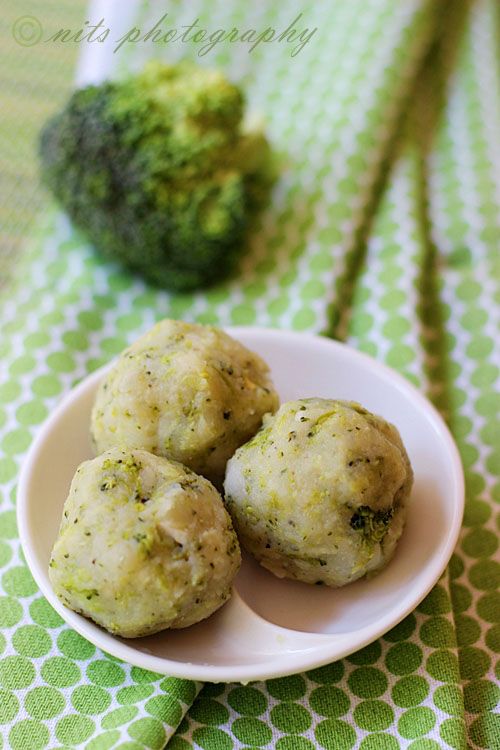
Boil potatoes, peel and mash thoroughly. Grate broccoli using a grater. 

Chop ginger and garlic into small pieces. 

Take two tsps of oil in a pan and fry the ginger garlic for few minutes. Add the grated broccoli and sprinkle few drops of water and cook in low flame for 5 minutes. Now add the cooked and smashed potato to it and saute. 

Finally add the salt, pepper powder, jeera powder and the lemon juice to it and mix well. 

Allow it to cool down and make small balls of the filling. 

To make the coating:

Mix the besan flour, rice flour, chilly powder, asafoetida and salt together by adding adequate water to it to make a dropping consistency batter. 

Now take the above made broccoli potato balls and dip it in the batter and deep fry the vadas. I used a paniyaram skillet to fry the balls to avoid deep frying. 

Once it has browned on all sides, remove from oil and strain the excess oil on a tissue. 

To make the chutneys:

Grind the coriander leaves, mint leaves, green chilly, lemon juice, garam masala and salt together by adding little water to it. Once it becomes a smooth paste collect it in a bowl. Green chutney is ready. 

Grind the coconut, red chilly, garlic, tamarind paste and salt together into a smooth paste to make red chutney. 

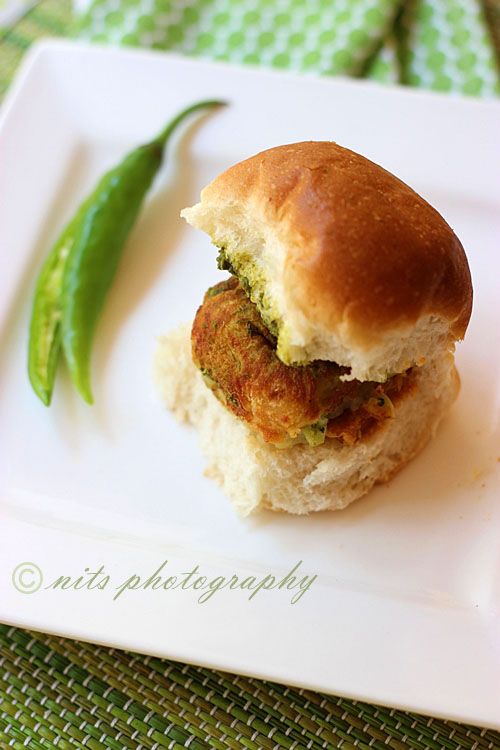
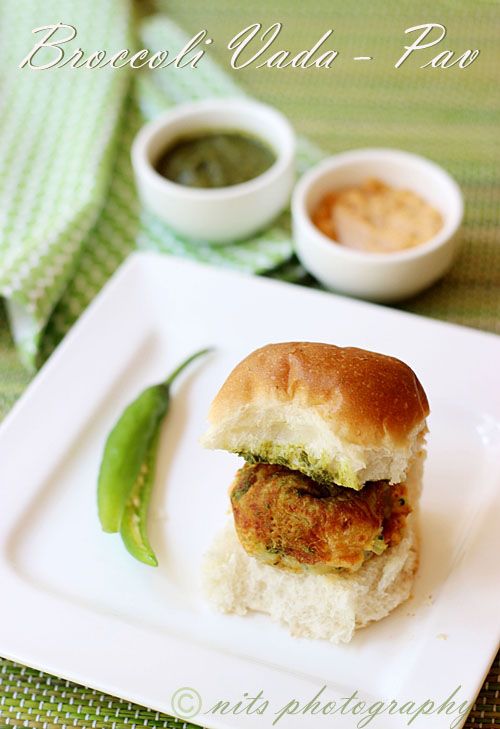
Now slit open the pav buns. Apply green chutney on one side and red chutney on the other side. Place one vada in the center and assemble the vada pav.

Serve hot and enjoy the delicious vada pav :)

 photo Vadapav3_zps369286c7.jpg

Written by: Nithya
Send in your queries by clicking here

Popular Posts

Flickr Photostream

www.flickr.com
nits food clicks' items tagged with nitsclicks More of nits food clicks'
Featured on Baking is Hot
my foodgawker gallery
Foodista Drink Blog of the Day Badge