Sunday, October 31, 2010

Diwali Dhamaka #1 - Ras Malai

Happy Diwali

The festive mood is on!! :) :) :)

Diyas spread all over the streets.
The shopping spree has reached its extreme.
Dham!! dhoom!! Dum!! Damal!! crackers everywhere :)

Diwali is the most exciting festival according to me. Its filled with fun and fiesta :) The celebrations of this festival starts quite early and goes on for almost 5 days :)

Yup!! so the Diwali Dhamaka would go on for 5 days in fourth sense cooking too :) I am all excited to share my joy and celebrate along with my readers :)

Diwali or Deepavali is celebrated for various reasons and in different ways throughout India. So lets know more about it throughout this series :)

Ras malai1

Being a south India, let me start of with celebrations in South India.

Narakasura ruled the kingdom called Pradyoshapuram. Puranas say that Naraka, son of Bhudevi, acquired immense power from blessings given by Lord Brahma after a severe penance. Under his rule, the villagers suffered a lot of hardship as the demon tortured the people.

Unable to bear the tyranny of the demon, the celestial beings pleaded with Lord Krishna to save them from his torture. But Naraka had a boon that he would face death only by the hands of his mother Bhudevi. So, Krishna asks his wife Sathyabhama, the reincarnation of Bhudevi, to be his charioteer in the battle with Naraka.

When Krishna fell unconscious after being hit by an arrow of Naraka, Sathyabhama takes the bow and aims the arrow at Naraka, killing him instantly. Later Lord Krishna reminds her of the boon she had sought as Bhudevi. The Narakasura Vadh by Sathyabhama could also be taken to interpret that parents should not hesitate to punish their children when they step in to the wrong path.

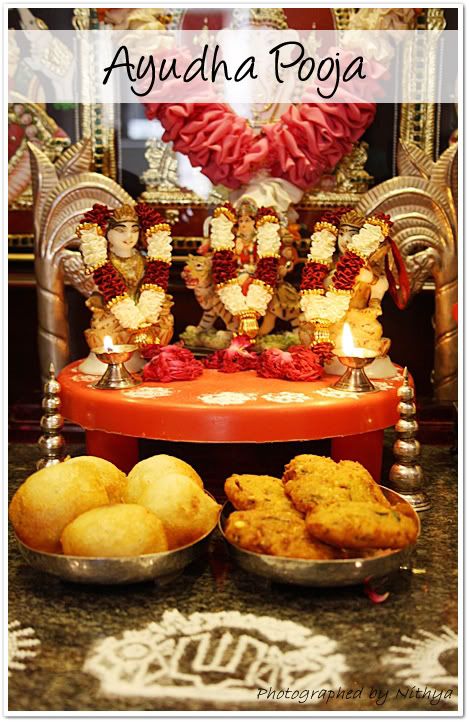
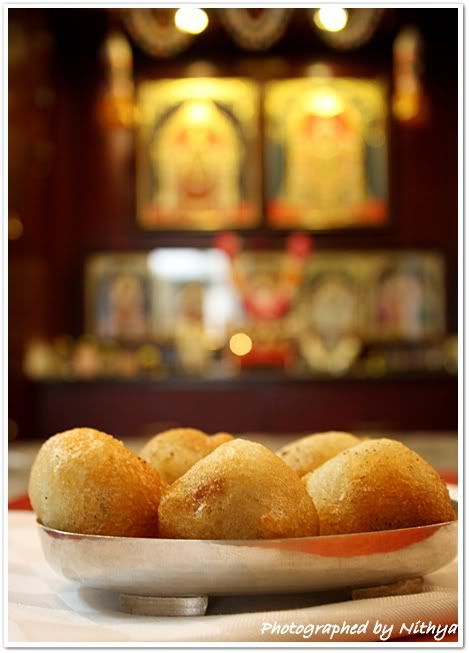
The message of Naraka Chaturdashi Parva is that the good of the society should always prevail over one's own personal bonds. It is interesting to note that Bhudevi, mother of the slain demon Naraka, declared that his death should not be a day of mourning but an occasion to celebrate and rejoice. It is said Lord Krishna had an oil bath to rid himself off the blood spattered on his body when Naraka was killed. Which then became a practice to take oil bath on this day.
Ras malai2

Ingredients:


Ras :

Milk - 1 ltr
Sugar - 1 cup
Cardamom powder
Saffron

Malai:

Milk - 1 ltr
Lemon - 1
Ice cubes
Water - 3 1/2 cups
Sugar - 500 gms

Ras malai4

Method:

For Ras:

Boil the milk in a non stick pan. Simmer the stove and allow it to condense to half its quantity.

Once done, add sugar and mix till it gets dissolved.

Take two tsps of hot milk and soak few saffron strands in it for ten mins.

Add the soaked saffron strands along with the milk and mix it. Finally sprinkle some cardamom powder.

Ras is ready. Refrigerate it until use.

Ras malai

Method for Malai:

Boil milk in a vessel and once it starts to raise pour in the lemon extract and switch off the stove. Mix with a ladle until it curdles. Drop in ice cubes into the vessel immediately.

Then drain it in a thin muslin cloth or handkerchief. Hold it covered with cloth in the running water. This is to remove the lemon flavor from the prepared paneer.

Hang the cloth and allow it to drain for half an hour.

Now press and remove the excess water and transfer it to a bowl. Kneed the soft paneer into a dough. Roll into small balls and press them a lit flat.

Take the water and sugar in the pressure pan and mix till it dissolves. Once the water starts boiling drop in the rolled malai balls and pressure cook with weight on top for a whistle.

Switch off the stove and keep the pressure cooker under running water to cool it soon. Open immediately and transfer the cooked balls along with the sugar water to a different bowl. Leave it alone for 4 to 5 hours.

Later remove the the balls from the jeera and press them gently to remove excess jeera and drop them into the prepared ras.

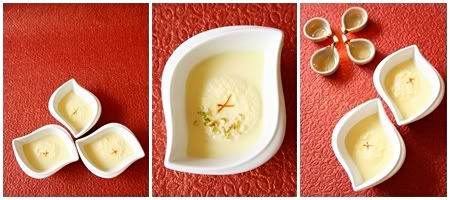
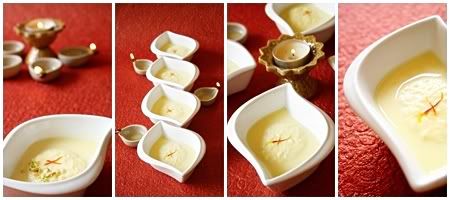
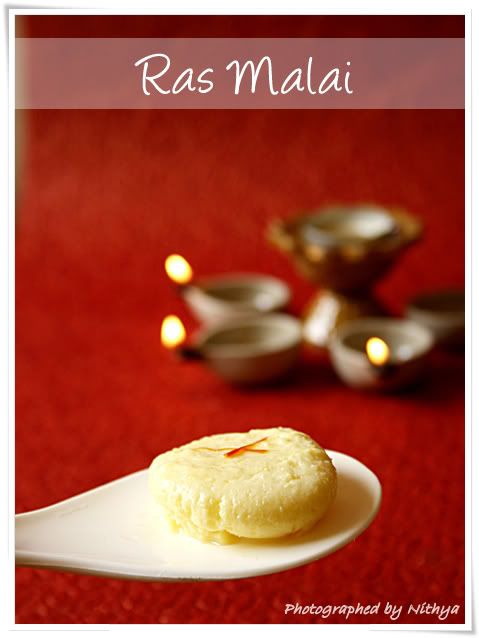
Ras malai is ready :)

Serve it cold and top it with chopped almonds and pista.

Enjoy eating a rich and yummy dessert :)
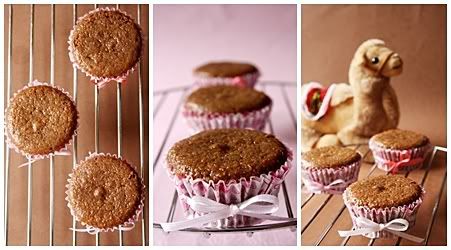
Ras malai3
Written by: Nithya
Send in your queries by clicking here.

Thursday, October 28, 2010

Carrot Rice

Carrot rice1

When I was a toddler, most of my eating habits depended or was inspired from cartoons. I loved spinach because Popeye loves it. I wanted cheese since Jerry was excited about it and in the same lines, carrots were introduced to me by Bugs Bunny :)

Yes!! I'm literally a Bunny rabbit when it comes to carrots :) love to munch them as it is and would some times eat them along with tomato ketchup. Believe me, its one of the best freaking combination ever ;)

Carrots are universally liked by many, at least I have not seen much of people who hate carrots. Hope you all agree with me!! If that is the case, one lovely form of cooking carrot is to make carrot rice :)

Its simple and super healthy :) Go on to the recipe and I bet you would love it too :)

Carrot rice

Ingredients:

Rice - 1 cup
Carrot - 3
Onion - 2
Red chillies - 3
Channa dhall - 2 tsp
Urad dhall - 2 tsp
Cumin seeds - 1 tsp
Coriander seeds(Dhaniya) - 2 tsp
Lemon juice - 1 tsp
Salt - for taste
Coriander leaves

Carrot rice3
Decoration: Used carrots for the petals, onion for the center part and curry leaves

Method:

In a pan, take a tsp of oil and fry red chillies, channa dhall, urad dhall, coriander seeds and cumin seeds just for a min and powder it finely.

Wash and soak rice for half an hour. Pressure cook with two cups of water. Once done allow it to cool on a plate. Add a tsp of ghee to the rice and separate the grains.

Chop onions finely and grate the carrots.

Heat two tsp of oil in a large pan and crackle mustard seeds. Add the chopped onions and fry till it turns golden brown. Once done add the grated carrot and fry for 2 mins adding a little salt to it. Then add the above said powdered masala to it and mix well.

Now add the rice and mix until everything comes together. Finally switch off the stove and add the tsp of lemon and salt and mix it well. Garnish with chopped coriander leaves.

Simple and tasty carrot rice is ready to eat :)

Enjoy the hot steaming carrot rice with some potato chips :)
Happy eating :)

Carrot rice2

Written by: Nithya
Send in your queries by clicking here.

Sunday, October 24, 2010

Eggless Vanilla Tutti Frutti & Choco Chip Muffins

Vanilla tutti frutti muffins

I have lately been on a baking spree.. or precisely on an eggless baking spree :)

Did you know??!! "Pisceans are dreamy" and me being a foodie piscean with a sweet tooth would always dream about cakes and desserts :P Aha no wonder! ;)

Every time I enter my kitchen paradise, the muffin tray and the new liners keep saying "hi" to me ;)

So this time picked them out to make eggless vanilla muffins topped with colorful tutti frutti for a batch and chocoholic's favorite chocolate chips for the other batch. :)

Both turned out to be a hit at home :) They came out so fluffy and soft. Melting in the mouth cakes for sure :)

Vanilla tutti frutti muffins2

Ingredients:

All purpose flour(Maida) - 1 1/2 cups
Corn starch/flour - 1 1/2 tsp
Baking powder - 1 1/2 tsp
Salt - a pinch
Powdered sugar - 3/4 cup
Butter - 1/4 cup
Milk - 3/4 cup
Vanilla essence - 1 tsp
Tutti frutti
Chocolate chips

Vanilla tutti frutti muffins1

Method:

Cream the butter and sugar in a bowl using a electric beater or whisk till it becomes lite.

Sift the all purpose flour, corn flour, baking powder and salt together and keep it aside.

Mix in the vanilla extract to the milk and add the milk and flour alternatively to the creamed butter beating it well. Once all the milk and flour is incorporated, beat continuously in medium speed for two mins.

Finally add the chopped tutti frutti to the cake batter and mix it just once.

Preheat oven to 375°F or 190°C. Line the muffin tray with liners.

Fill muffin cups upto 3/4th and sprinkle some tutti frutti on top as well.

Bake it for 20 mins at 375°F or 190°C. Adjust the time according to your oven settings.


Check if cooked by inserting a tooth pic in the center. Once done, allow it to cool on a wire rack for a while.


Vanilla choco chip muffins1


Replace the tutti fruitti by chocolate chips or mini chocolate chips to make choco chip muffins :)

You can use nuts of your choice to make it extra rich too :)

I used tutti frutti for 6 muffins and the other six with chocolate chips :)

Vanilla choco chip muffins2

Cute looking and yummy eggless Vanilla muffins with tutti frutti and chocolate chips are ready to eat :)

This quantity would make around 10-12 medium sized muffins :)

Enjoy making :) Happy eating :)

Vanilla choco chip muffins


Written by: Nithya
Send in your queries by clicking here.

Friday, October 22, 2010

Masala Papad - A Simple Crunchy Starter

Masala Papad4

Masala papad is a very tasty Indian starter which always tops the menu card. It can also be a best snack for the 4 O'clock tummy grumble :)

Crispy papad with crunchy fresh vegetables, tangy lemon and spicy chilly powder makes it one of the most interesting appetizer. Yummmmm :)

All you need is papad and some fresh vegetables. The recipe is handy and can be made within a jiffy.

I love garlic papad and hence it was my choice for masala papad too. The flavor is totally upto you :) Freak out with your choice of papad and veggies :)

Masala Papad

Ingredients:

Papad - 2
Onion - 1
Tomato - 1
Cucumber - 1/2 (optional)
Green chilly - 1
Cilantro
Lemon juice or Amchur powder
Chilly powder
Chaat masala
Salt

Masala Papad2

Method:

Roast the papad carefully on direct flame and lay them on the plate. You can microwave the papad on high for a min too. But I always prefer direct roasting since the slightly burnt taste adds to the flavor of the starter. :)

Chop onion, tomato, cucumber, green chilly and cilantro finely and mix them together in a bowl. Drizzle some lemon juice, sprinkle some salt and chilly powder and mix well.

Spread it on the papad and finally sprinkle some chaat masala on top and serve it immediately.

Masala papad is ready to eat :) Eat it quickly to enjoy the crunchiness of the papad :)

Happy snacking :)

Masala Papad3

Alternative:

Simply crack the papad into small pieces and mix it with the vegetable salad and serve it as a crunchy salad. :)

You can use fried papad for the salad.

Masala Papad1

Written by: Nithya
Send in your queries by clicking here.

Wednesday, October 20, 2010

Channa Pulao

Channa Pulao

Channa tops the list of my legume love :) Especially the white ones. I can consume unlimited :P if its made into channa masala or a simple sundal or rasam or as pulao. Name it and I would love it :)

This time it was pulao in mind when I picked a pack of channa(chickpea) at the grocery store :) Hmmmm frankly speaking, its a little time consuming process to make this pulao. But I bet you would not regret the time spent. Trust me, it tastes simply fantastic.

The soft channa here and there, the creamy coconut milk texture on the long basmathi rice, the hint of kasoori methi tickling your nose, along with... oh yeah!! my favorite garlic :) ummmmm I cant speak more ;)

Channa Pulao3

Ingredients:

Basmathi Rice - 1 cup
White Kabuli channa - 1/2 cup
Tomatoes - 3
Coconut - 1/2 small
Onion - 2 (medium sized)
Garlic - 8 flakes
Green chillies - 4
Kasoori methi - 1 tbl sp
Garam masala powder - 1/2 tsp
Cinnamon - 1 inch piece
Cardamoms - 2
Cloves - 2
Bay leaf - 1
Ghee
Salt - for taste
Coriander leaves - 1/2 bunch(optional)

Grind together:

Onion - 1 (large)
Red chillies - 8
Cumin seeds - 1 tsp
Garlic - 5 flakes
Grated fresh coconut - 2 tbl sp

Channa Pulao2

Method:

In a pan, take a tsp of oil and fry red chillies, cumin seeds, garlic and onion for few mins. Allow it to cool down and then grind it along with coconut and keep it aside.

Soak channa in water for 10 hours and then pressure cook it.

Blanch tomatoes in hot water for few mins and remove the skin and seeds. Grind it into a smooth paste. Strain and keep it aside.

Grate coconut and grind it along with enough water and strain two extracts of coconut milk.

Peel garlic and chop them finely.

Soak rice in water for 10 mins and then drain it completely. Heat a tsp of ghee in a pan and fry the rice for few mins till all the moisture is absorbed.

Heat oil in a pressure cooker and fry cardamom, cinnamon, cloves and bay leaf. Add the chopped garlic and fry till brown. Now add slit green chillies and finely chopped onions and fry for few mins and then add the ground paste. Simmer the stove and fry till the aroma pulls people at home to the kitchen!!! ;)

Now add tomato paste, kasoori methi, salt, little sugar, garam masala powder and allow it to boil for few mins. Then add the cooked channa and 1 1/2 cups of coconut milk to it. When it starts to boil, add the rice and mix well. Now close the pressure cooker and allow it to cook for just one whistle. (timing can vary on different parameters)

Garnish with finely chopped coriander leaves and ghee fried cashews. :)

Yummy and aromatic channa pualo is really to eat :)

Enjoy it hot with potato chips or onion raitha :)

Channa Pulao1

I'm happy to send this to the "Legume Love Affair" event conducted by Divya of Dil Se which was started on the blog "Well seasoned cook".

Written by:
Nithya
Send in your queries by clicking here.

Monday, October 18, 2010

Ayudha Pooja Celebration 2010

Ayudha pooja5

Ayudha pooja is the festival to worship the Implements that we use everyday. It is to thank all the instruments that helps us accomplish our tasks.

It falls on the last day of Navarathri and is celebrated in a grand way by South Indians.

The three goddesses, Saraswathi (the Goddess of wisdom, arts and literature), Lakshmi (the goddess of wealth) and Parvathi (the divine mother) are worshiped on this day.

Apart from worship to god, we also perform pooja to the vehicles that we use.

Ayudha pooja
You can see the comical Kolam that I did depicting the pooja at home ;)

This year we made a traditional sweet called Suzhiyan / Suvunta along with masala vada as prasadam to God.

You can see last year's celebration by clicking here.

Ayudha pooja1

Ingredients:

For the filling:

Bengal gram dhall(Kadala paruppu) - 1 cup
Jaggery - 1 1/4 cup
Cardamom - 2
Ghee - 1 tbsp

For the batter:

Par boiled rice - 1 cup
Urad dhall - 1/4 cup
Salt - a pinch

Ayudha pooja4

Method:

To make the filling:

Pressure cook bengal gram dhall with adequate water. Grind it along with jaggery and cardamom into a smooth paste by adding just a little water.

Take a pan, put in some ghee and the ground paste and fry till it becomes thick and rolls into a ball.

Now make small balls of the filling and keep them aside.

To make the batter:

Soak par boiled rice and urad dhall separately in water for around 2 hours. Grind them one by one into a smooth paste and finally mix them together in a bowl. Add a pinch of salt and mix well.

Now dip the filling balls in the batter and deep fry in oil till it turns golden color.

The suzhiyan is ready :)

Serve it hot.

Enjoy eating :)

Ayudha pooja6

Note:

The batter should be thicker than dosa batter.

Do not ferment the batter. Use it immediately.

Ayudha pooja2

Ingredients:

Bengal gram dhall - 3/4 cup
Thoor dhal l(Thuvaram paruppu) - 1/4 cup
Big onions - 2
Green chillies - 2
Ginger - 1 inch piece
Curry leaves
Pudina leaves
Coriander leaves
Salt

Method:

Soak the dhalls together for one hour. Grind the dhalls into a thick and coarse batter.

Now grind chillies and ginger and add them to the batter.

Chop onions, curry leaves, coriander and mint leaves finely and add them to the batter.

Add some salt and mix it all together.

Make small balls and pat them flat with your fingers and deep fry in hot oil until it gets roasted on both the sides.

Keep the flame in medium to maintain even cooking of the vada.

Hot and crispy masala vada is ready to eat :)

Goes well with hot chai :) Enjoy making :)

Ayudha pooja3

Written by: Nithya
Send in your queries by clicking here.

Tuesday, October 12, 2010

Eggless Black Forest Cup Cakes

Chocolate cupcakes4


The irresistible Black forest cakes have always been on my dreams. Next to chocolate truffle, this is one best cake I always relish :)

A bite of the soft chocolaty cake along with a layer of fluffy fresh cream and cherries!!! ummmmmm.. sheer melt in the mouth ecstasy :)

I totally believe the proverb that says "Good things come in small packages" ;) Hence the ever delicious black forest cakes in the form of small and extra small cupcakes never fail to be called the best :)

Today is my little friend Poorni's birthday. :) Hence I wish to dedicate this Black forest cup cake post to the little princess and also wish her a great birthday and a lovely life ahead too :) Warm Hugs to you dear :)

Chocolate cupcakes7

Egg-less Chocolate Cup Cakes

Method:

All purpose flour(Maida) - 100 gm
Condensed milk - 200 gm
Baking powder - 1/2 tsp
Soda -bi-carb(Cooking soda) - 1/2 tsp
Butter - 2 tbsp
Cocoa powder - 2 tbsp
Powdered sugar - 2 tbsp (according to taste)
Aerated water(soda) - 100 ml

Chocolate cupcakes8

Method:

Sift all purpose flour, baking powder, cooking soda, powdered sugar and cocoa powder together and keep them aside.

Bring butter to room temperature and beat it along with condensed milk.

Now add the sifted dry ingredients to the butter and condensed milk mixture and beat for few mins till it comes together. Finally add the aerated water(soda) and mix quickly.

Preheat oven to 375°F or 190°C. Line the muffin tray with liners.

Fill muffin cups upto 3/4th and bake it for 15-20 mins at 375°F or 190°C. Adjust the time according to your oven settings.


Check if cooked by inserting a tooth pic in the center. Once done, allow it to cool on a wire rack for a while.

Perfect and yummy egg-less chocolate cup cakes are ready :) They are absolutely fluffy and soft :)

The quantity specified would yield 12 medium sized cup cakes.

Chocolate cupcakes5

Black Forest Cup Cakes

Ingredients:

Chocolate cup cakes - 12

for icing:

Fresh cream - 250 gm
Icing sugar - 1/3 cup

For decoration:

Grated chocolate
Cherries

For moistening:

Sugar syrup

Chocolate cupcakes10

Method:

Beat the fresh cream and icing sugar till fluffy.

Cool the cup cakes in the refrigerator for a while.

Moisten the cup cakes with sugar syrup. Pipe or apply the the cream on top of the cake. Decorate with some chocolate shavings and cherries.

Yummilicious and cute looking black forest cup cakes are ready to serve :)

Serve it chilled :)

Enjoy making and happy eating :)

Photobucket

Mini cup cakes were the highlight of the day. :)

I had got some cute looking mini muffin liners from Dubai and was pretty excited to use them while baking :)


Its just the same procedure that I followed to bake the cakes but reduced the cooking time to 13 mins.

Chocolate cupcakes9

They are literally bite sized and too cute :)

Hardly two cms tall muffins excited all of us at home :)

Instead of cherries, I used the sugar coated cumin sweet(Jeeraga mittai) on top of the cream to make the miniatures ;)

Chocolate cupcakes3
Small Wonder ;)

Sending this post to Kid's delight - Chocolate feast :)


Written by: Nithya
Send in your queries by clicking here.

Sunday, October 10, 2010

Stuffed Capsicum Subzi

Stuffed capsicum Subzi2

Hard work pays off!!

This saying goes right for stuffed capsicum subzi :) Its a long process to make it, but extremely worth the pains taken. The result is a subzi which is so tangy, yummy, crunchy, spicy, good looking :P and so on :) Totally scrumptious :)

After a big break of sickness and vacation, I was longing to get back with a bang!! And this was the dish I thought that could bring me back totally into the cooking spree :)

Its ages since we made stuffed capsicum subzi at home and I was absolutely tempted to make it when my mom reminded me of its taste and colorful cute looks :P It was a total coincidence that my vegetable vendor brought me some small and perfectly apt capsicums the next day and I was on my toes to make it right away :)

Verdict : Absolutely tasty and scrumptious subzi that fits like a glove with chapathi or roti :) **chef recommends :P

Stuffed capsicum Subzi3

Ingredients:

For stuffing -

Capsicum(Bell peppers) small sized - 6
Potatoes - 2
Onions - 2
Coconut - 3 tblsp
Sesame seeds(yellu) - 2 tsp
Cinnamon - 1 inch piece
Cloves - 2
Cardamom - 2
Garam masala powder - 1/2 tsp
Turmeric powder - 1/4 tsp
Green chillies - 2
Salt - for taste

Stuffed capsicum Subzi5

Method:

Cut out the top portion(stem) of the capsicum and scoop the seeds out cleanly. Apply some salt inside and place them upside down on a plate for a while. Then drop them into a bowl of warm water and leave it alone for 5 mins and take them out.

Boil potatoes and mash them thoroughly. Screw a skewer or knife into the onion and roast them on direct flame for a while until it gets cooked. Once done remove the top most black peel alone. In a pan fry coconut, sesame seeds, cinnamon, clove, and cardamom for just few mins and grind them all together with the roasted onion into a smooth paste.

Take a wok and add few tsps of oil to it and add the ground paste, mashed potatoes, garam masala powder, turmeric powder, chopped chillies and salt to it and cook for few mins.

Now stuff the prepared filling into the capsicums.

Stuffed capsicum Subzi1

Ingredients for Subzi(gravy) :

Onions - 3
Garlic - 6 pods
Ginger - 1/2 inch piece
Tomatoes - 6
Chilly powder - for taste
Garam masala - for taste
Dhaniya powder - for taste
Salt - for taste
Coriander leaves

Stuffed capsicum Subzi

Method :

Chop one onion finely and keep it aside. Grind 2 onions, tomatoes, ginger and garlic into a paste.

Take a pan and add two tsp of oil and drop in the chopped onion and fry till it turns golden brown. once done, add the ground paste and fry till the raw smell goes. Now add chilly powder, garam masala, dhaniya(coriander) powder and salt to it and mix well. Once the gravy starts boiling, place the stuffed capsicums on the pan. Simmer the stove, close the pan and allow it to cook for a while. Once its all cooked evenly, remove it from the stove and add finely chopped coriander leaves.

Stuffed capsicum subzi is ready. Serve it hot with chapathi, rice, poori etc. :)

Stuffed capsicum Subzi4

Written by: Nithya
Send in your queries by clicking here.

Popular Posts

Flickr Photostream

www.flickr.com
nits food clicks' items tagged with nitsclicks More of nits food clicks'
Featured on Baking is Hot
my foodgawker gallery
Foodista Drink Blog of the Day Badge