Sunday, July 31, 2011

Guest Post : Food Photography - Properties and Backgrounds

Hellooooooo Blogger buddies and friends.. I'm on a happy feet dance today. My first guest post ever and it being my first post about food photography is up today :)

Pretty thrilled about how people would respond to it :)

All thanks to my super talented blog buddy Lubna of "Yummy Food" for asking me to write for her. Checkout her blog to read my post about Food photography - Backgrounds and Properties :)

Photobucket

Know how I go about choosing properties and background colors for my food presentation :)

Photobucket

Written by: Nithya
Send in your queries by clicking here.

Thursday, July 28, 2011

Oreo Expresso Shake

Oreo Expresso Shake

IRRESISTIBLE!! Absolutely delicious shake I have ever enjoyed. I Was even craving for more just after I completed that large goblet ;) The goodness of chocolate and coffee in a sip was simply yummilicious to the core.

And this is what I made with the left over oreo cookies :)

Have a freaking weekend :) enjoy with a cup of oreo expresso shake :)

Oreo Expresso Shake2

Ingredients:

Oreo cookies (with cream) - 2
Oreo cookies (without cream) - 3
Instant expresso powder - 1 tsp
Chocolate syrup - 1 1/2 tblsp
Milk - 1 cup
Whipped cream - for topping

Oreo Expresso Shake3

Method:

Add 1 tsp of water to the instant expresso powder and dilute it.

Crush the biscuits and blend along with milk, diluted expresso and chocolate syrup until smooth.

Pour in the serving glass and top it with whipped cream and crushed oreo.

Serve chill.

Enjoy a delicious oreo drink :)

Oreo Expresso Shake1

Note:

Add some vanilla ice cream while blending for extra richness :)

You can replace chocolate syrup with melted chocolate.

Skip the expresso for a super chocolatey oreo drink.

Oreo Expresso Shake4

Written by: Nithya
Send in your queries by clicking here.

Tuesday, July 26, 2011

Angry Birds Cake :)

Angry birds5

Its Angry Birds fever everywhere!! :) A happy fever that spread so fast and entertained a big crowd all over the world :)

I was a victim to its addiction too and enjoyed cracking level after level :) The love for the cute game even made me create cakes on the similar lines :)

This is what I made with those plain Vanilla cupcakes :)

Angry birds1

For those who don't know!?!

Angry Birds is a puzzle video game developed by Finland-based Rovio Mobile. Inspired primarily by a sketch of stylized wingless birds, the game was first released for Apple's iOS. Since that time, over 12 million copies of the game have been purchased from Apple's App Store, which has prompted the company to design versions for other touchscreen-based smartphones, such as those using the Android Operating system, among others.

Photobucket

How is it played!?!

In the game, players use a Slingshot to launch birds at pigs stationed on or within various structures, with the intent of destroying all the pigs on the playfield. As players advance through the game, new birds appear, some with special abilities that can be activated by the player.

You can play the game here -
http://chrome.angrybirds.com/

Angry birds4

How did they come up with it!?!

Initially Rovio's senior game designer Jaakko Iisalo came up with the illustration of wingless angry looking birds that impressed the team a lot and encouraged them to create a game based on the bird.

Since swine flu was popular or the papers, the designers decided to design pigs as the enemies :) so on and so forth the game has become way too popular now :)

Angry birds2

What have I used to design the birds and pigs!?

Vanilla cup cakes
- for the body
Whipped cream + food colors - for the body color
Oreo cookies (cream side) - for the eyes
Oreo cookies (creamless side) - for the eyebrows
Cadbury shots chocolate - for the eye balls
Cadbury gems - for the beak
Lego blocks - for the pigs castle

Tatadaaa!!! Angry birds cake are ready to take revenge on their enemy pigs :P

Angry birds

Whats next!?!

After all the yummy bird indulgence, I was left out with lots of oreo cookies(Cream less sides).

Wait to watch what I made with the left over Oreo cookies in the coming up post !! ;)

Written by: Nithya
Send in your queries by clicking here.


Monday, July 25, 2011

Vanilla Cup Cakes

Vanilla cup cakes1

I prefer cup cakes than cakes since they are quick to make and handy too. This time made these cakes to experiment my decorating skills ;) ummmhhmm cant show them right away :P Will share the recipe first and would reveal the decorated cakes in my next post :)

This recipe is a basic vanilla cake with eggs. This recipe can be kept as the base to try out loads of variations :)

Vanilla cup cakes4

Ingredients:

All purpose flour(Maida) - 125 gms
Baking powder - 1 1/2 tsp
Salt - 1/4 tsp
Butter - 100 gms
Powdered sugar - 150 gms
Eggs - 2
Vanilla essence - 1 tsp
Milk - 1/4 cup
Lime juice - 1 tsp

Vanilla cup cakes2

Method:

Chop the butter into small cubes and drop them into the beating bowl. Add sugar in two parts and beat until fluffy.

Now add one egg at a time and beat well for each addition until well incorporated. Add vanilla essence, lime juice and mix well. Now add the milk in two parts and beat. Finally add the flour mixture and fold gently.

Preheat oven to 375°F or 190°C. Line the muffin tray with liners.

Fill muffin cups upto 3/4th bake it for 20 mins at 375°F or 190°C.

Check if cooked by inserting a tooth pic in the center. Its done if the toothpick comes out clean.

Allow it to cool on a wire rack for a while.


Soft and fluffy cup cakes are ready :)

This quantity would make 8 medium sized cup cakes.

Top them with cream and decorate as you like :)

Vanilla cup cakes3

Tips:

Make this basic vanilla cake and bake them in greased and dusted trays for large cakes :)

Vanilla cup cakes

Wait for my next post to see how these plain cup cakes were disguised!! ;)

Written by: Nithya
Send in your queries by clicking here.


Thursday, July 21, 2011

Rose - Pom Splash

Rose Pom Splash

My sis had visited me a couple of days back and we were having a good time together. Around mid of the day both of us got so thirsty and decided to stir up something. During the brainstorming session and a treasure hunt at my pantry we picked up random fruits and syrups which ended up in an extremely delicious drink :) And we together named it as Rose - Pom Splash :)

While imagining how to click the drink, I remembered the click that my blogger buddy Bharathy posted on FB recently and immediately tried to do something on the similar lines and ended up with a pretty red splash :) Doesn't that look so refreshing!! Yup :)

Oh No...I burnt all the energy that I gained by having the drink to clean up the entire mess after that beautiful click :P

Rose Pom Splash1

Ingredients:

Rose syrup - 2 tblsp
Pomegranate juice - 1/2 cup
Lemon juice - 2 tsp
Water
Honey

Rose Pom Splash2

Method:

Deseed the pomegranate. Drop them into the mixie and pulse 3 to 4 times and pass it through a sieve to remove the seeds completely. The extract should be red and semi transparent.

Take a tall glass and pour in the pomegranate juice, rose syrup, lemon juice, honey and enough water to fill the glass. Mix thoroughly with a stirrer.

Drop in few ice cubes and serve chill.

Enjoy the delicious and flavorful Rose Pom splash :)

Rose Pom Splash3

Tips:

Add soda instead of water for a fizz.

Replace honey with sugar if you like them sweeter.

Rose Pom Splash4

Written by:
Nithya
Send in your queries by clicking here.

Tuesday, July 19, 2011

Caramel Pudding / Flan

Flan4

I claim to be an eggetarian, but then I like them and prefer eating them only in desserts and cakes.

This is my first try using eggs in a pudding and guess what?! I totally dint feel the smell or taste of eggs in it and people at home loved it too :)

The magic is in the caramel! :) It makes the pudding simply out of the world :) Dont they look gorgeous?!! :)

Meanwhile if you prefer to skip the eggs and go simple, then peep into my buddy - Sharmilee's blog where she has posted an eggless version of Vanilla pudding right today :)


Flan1

Ingredients:

For caramel :

Sugar - 20 gms
Water - 2 tblsp

For vanilla pudding :

Milk - 500 ml
Sugar - 50 gms
Eggs - 3
Vanilla essence - 1/2 tsp

Flan5

Method:

For making caramel -

Take the sugar in a dry pan and leave it untouched until all the sugar melts down. Add water when the sugar starts bubbling and now simmer the flame and keep stirring until this mixture turns golden brown.
Pour the prepared caramel in your moulds or ramekins and spread them all over the base and keep them aside.

For making vanilla pudding -

Beat eggs and sugar in a bowl until the sugar dissolves. Now heat the milk and just when it starts to boil, remove it from flame and add it to the egg sugar mixture and beat for few mins. Add the vanilla essence and give a whip. Pass this mixture through a sieve to remove undissolved egg white strands. Pour in the milk mixture into the prepared ramekins carefully using a ladle.

Preheat the oven to 375°F or 190°C.

Take a large baking pan and pour water upto 1 inch height. Now arrange the ramekins on the pan with water and leave the pan on lower rack of the oven. Bake in 375°F or 190°C for 35-45 mins.

Once done, check if it is cooked by inserting a knife. Its done if the knife comes out clean.

Allow this to cool for a while and refrigerate for an hour atleast before serving.

Run a knife around the pudding to loosen it and invert the ramekins on the serving plate.

A delicious caramel coated vanilla pudding or flan is ready :)

This quantity would make about 6-8 flans.

Enjoy whipping up a simple dessert :)

Flan2

Note:

Its your choice to keep the caramel light or dark. Allow the caramel to darken more for a punch of bitterness in the pudding :)

This process of baking is nothing but like steam cooking the pudding. So you can simply do it on stove top by steaming it using a shallow pan with water and a lid too.


Flan3

Written by: Nithya
Send in your queries by clicking here.


Monday, July 18, 2011

Bombay Chutney

Bombay chutney3

Bombay Chutney!! Yup its very much the name for this side dish that Mom or say Grandma has been making for ages. No one at home has a clue of why its called so!? If you guys know it, please give me some gyan! :)

Bombay chutney can be prepared in a jiffy with just few basic ingredients on hand and has always been handy on super boring days when I just don't feel like experimenting anything for long at the kitchen.

This pairs up so well with roti and poori and it just smells so good with the saunf flavoring :)

Bombay chutney1

Ingredients:

Gram flour or chick pea flour(Besan/Kadala maavu) – 1/2 cup
Water - 1 1/2 cup
Asafoetida(perungayam) - a pinch
Turmeric powder - 1/4 tsp
Onion - 1
Tomato - 2
Green chillies - 2
Garlic - 4 pods
Fennel(Saunf / Sombu) - 1 tsp
Cinnamon(pattai) - 1/2 inch piece
Urad dhall - 1/2 tsp
Channa dhall - 1/2 tsp
Mustard - 1/2 tsp
Curry leaves

Salt - for taste

Bombay chutney

Method:

Chop the onion and tomatoes into cubes and slit the chilies. Dice the garlic pods finely.

Powder the cinnamon and saunf together.

Dilute gram flour, turmeric powder and salt in the water and keep it ready.

Take two tsp of oil in a pan and splutter mustard seeds, urad dhall and channa dhall. Drop in the curry leaves, chilly and fry for a min. Now add the chopped onion, tomato and garlic and fry until onion turns transparent.

Now add the ground saunf and cinnamon powder. Reduce the flame to the lowest mark and pour the gram flour water mixture while stirring continuously. Now increase the flame slightly and keep stirring until it gets cooked and becomes slightly thick and glossy.

Add chopped coriander leaves at this stage if desired and collected in the serving bowl.

Simple and quick Bombay chutney or Bombay Masala is ready to serve :)

Serve it hot with chapathi or poori.

Enjoy eating :)

Bombay chutney2

Tips:

Adding veggies to this chutney is totally optional. You can add more vegetables of your choice or even skip the tomatoes and onions to make it a plain chutney.

Bombay chutney4

Written by:
Nithya
Send in your queries by clicking here.

Thursday, July 14, 2011

Sweetcorn Mayo Sandwich

Sweet corn mayo sandwich5

In the two long years of blogging I have got a lot of exposure to new people and have made too many good friends too.

I was talking to one such super talented friend called Srivalli a couple of days back and between all the chit chats we had, she had told me about the Sandwich mela that she was planning to do on her blog. Since then, I was very interested in being a part of it and also grabbed this chance to gobble up some healthy sandwiches for breakfast :)

Mayonnaise in salads and sandwiches have always attracted me. I love its creamy texture and have always enjoyed the addition of mayo to any dish. So this time thought I should get a pack and give it a try at home :)
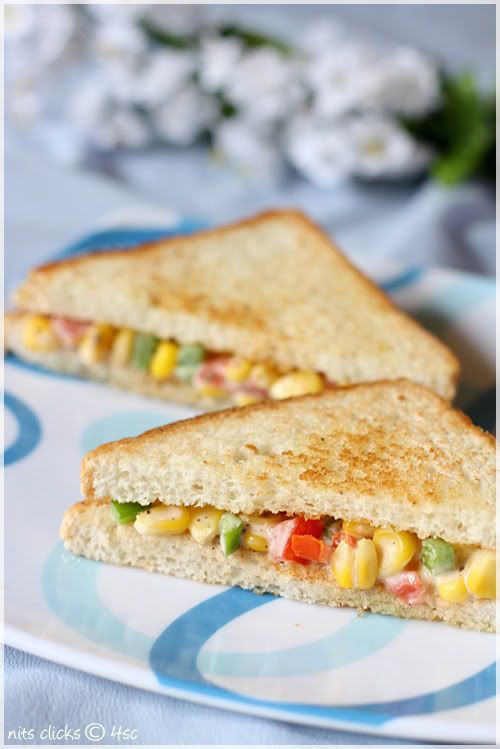
Sweet corn mayo sandwich2

What is Mayonnaise?

Mayonnaise also know as mayo is a sauce. A stable emulsion of oil, egg yolk and wither vinegar or lemon juice. They also have spices and herbs at times. The Lecithin in the egg yolk acts as an emulsifier. Mayonnaise is often cream in color and may range in texture from that of light running cream to thick.

This is used as a salad dressing and for sandwiches too.

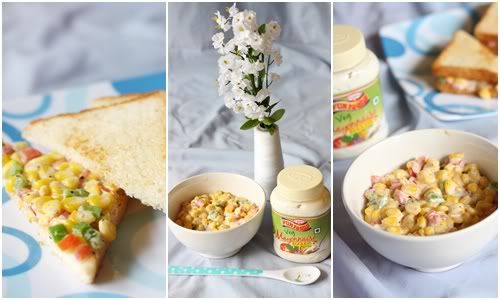
I have used Vegetarian mayonnaise for my sandwich. This veg mayo is made out of edible vegetable oil, water, sugar, milk solids, lemon juice, common salt, and emulsifying and stabilizing agents. So this creamy form of dressing is very useful for making delicious sandwiches and salads and its fully vegetarian :)

I have also heard of vegan mayonnaise that has soy milk instead of milk solids. So people, just grab a bottle of mayonnaise of your choice when you visit the store next time and enjoy making yummy sandwiches :)

Brand that I used: Fun Food - Veg Mayonnaise, 310g costs Rs.75 and is available in Fresh and Spencers Daily outlets.

Sweet corn mayo sandwich

Ingredients:

Sweet corn(de-seeded) - 1 cup
Capsicum(bell pepper) - 1 small
Tomato - 1 large
Mayonnaise - 3 tblsp
Black pepper powder - for taste
Salt - for taste

Sweet corn mayo sandwich4

Method:

Pressure cook corn cobs and de-seed it.

Chop capsicum and tomato into small cubes.

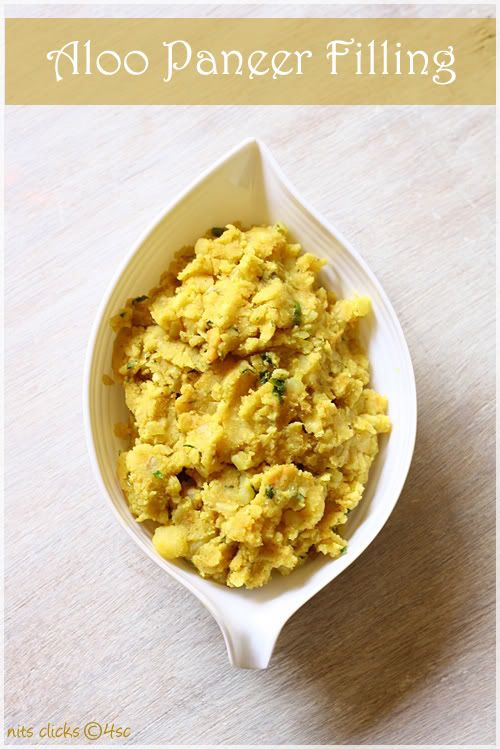
Take the corn and chopped veggies in a bowl and add mayonnaise, salt and pepper and give a good mix.

Keep this in the refrigerator for ten mins.

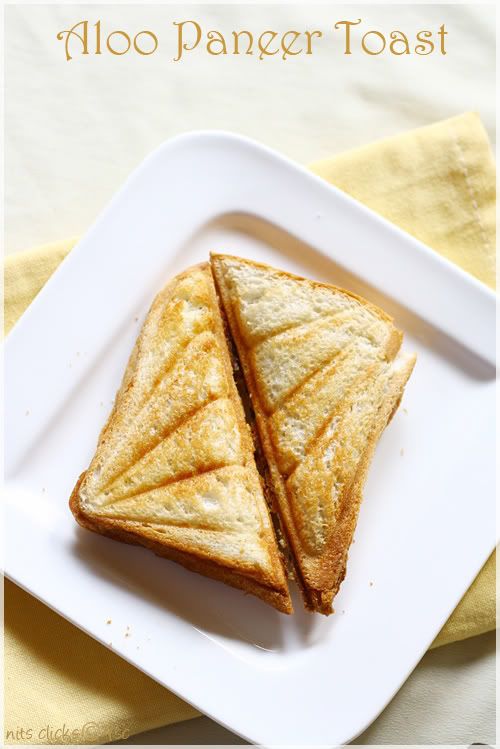
Apply butter on bread and pan roast it until golden brown.

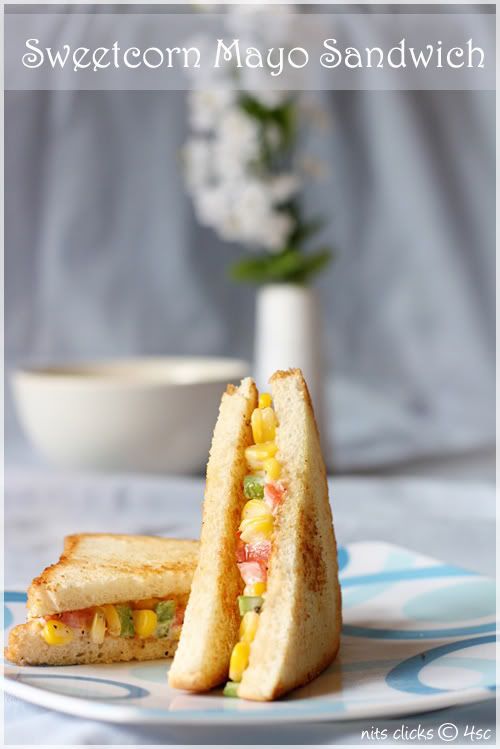
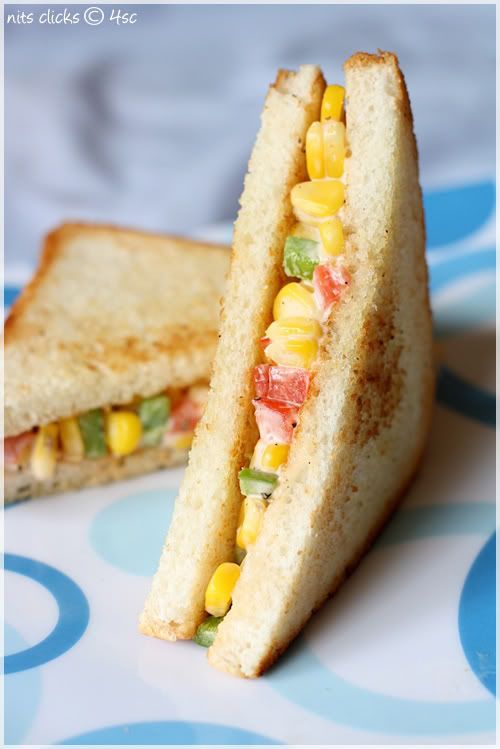
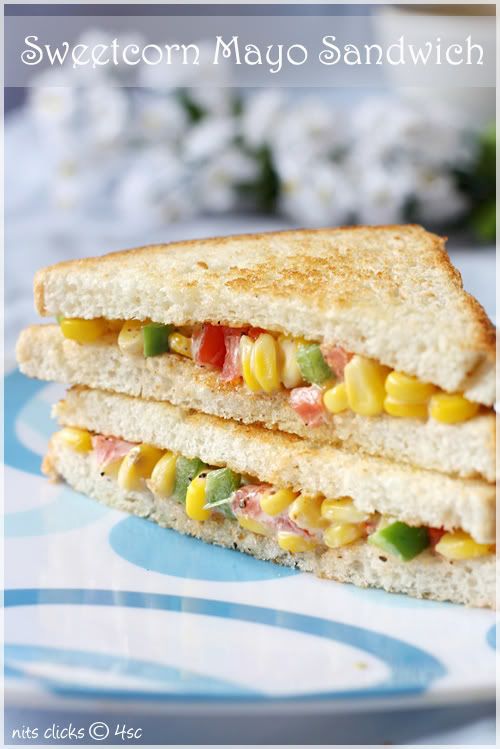
Now sandwich it by spreading a generous amount of corn mayo and enjoy eating :)

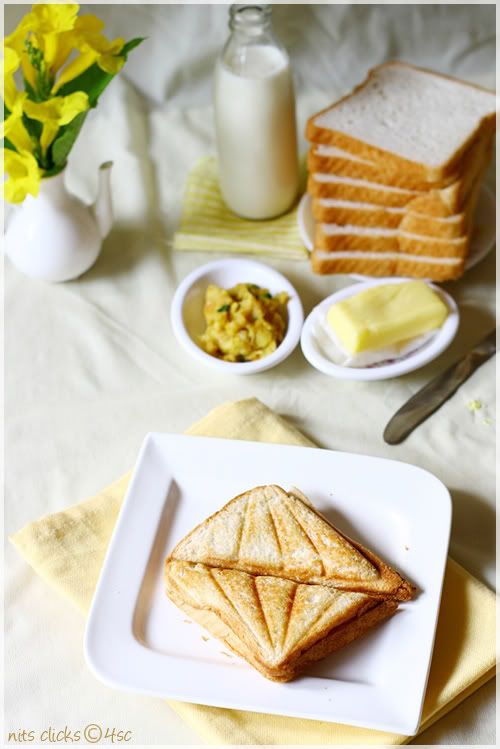
Simple and tasty corn and mayo sandwich is ready :)

Sweet corn mayo sandwich3

Tips:

Add veggies of your choice for the filling.

You can also toast the sandwich in a toaster.

You can also eat the corn and mayo mix just like a salad :)

Sweet corn mayo sandwich1

I am happy to send this to Srivalli's Sandwich Mela :)


Written by: Nithya
Send in your queries by clicking here.

Wednesday, July 13, 2011

Aloo Paneer Toast

Aloo paneer toast2

Dint I tell you guys that I reserved some potato paneer filling for a simple recipe!!! The simple recipe that uses the filling is this toast :)

The potato paneer filling complimented bread so well and we all loved this for breakfast :)

There are just two small differences in the filling, being the addition of lemon juice and skipping the corn flour.

Anyways a recap of the Aloo paneer filling comes with this post simply for the sake of visitors who hop in directly to this post :)

Aloo paneer toast4

Ingredients for the toast:

Bread slices
Butter
Aloo paneer filling

Aloo paneer toast

Ingredients for the filling:

Potato - 3
Paneer (grated) - 1/2 cup
Green chillies - 2
Onion - 1
Ginger - 1/4 inch piece
Garam Masala - 1/2 tsp
Turmeric powder - a pinch
Salt - for taste
Lemon juice - 1 tblsp

Aloo paneer toast5

Method:

Boil and mash potatoes. Chop onions, ginger and chillies finely.

Take two tsps of oil in a pan and saute onions until it turns transparent. Add the chillies and ginger and saute for a min. Drop in the mashed potatoes, grated paneer, salt, turmeric powder and garam masala, mix well and cook on medium flame for 3 to 4 mins, while stirring continuously. Simmer the stove and add the lemon juice and mix well.

Aloo paneer filling is ready.

Aloo paneer toast3

Apply butter on bread and sandwich two slices with a generous amount of aloo paneer filling. Toast them using a toaster until golden brown.

Serve it hot with ketchup.

Enjoy a simple and delicious toast :)

Aloo paneer toast1

I am happy to send this to Srivalli's Sandwich Mela :)


Written by: Nithya
Send in your queries by clicking here.

Popular Posts

Flickr Photostream

www.flickr.com
nits food clicks' items tagged with nitsclicks More of nits food clicks'
Featured on Baking is Hot
my foodgawker gallery
Foodista Drink Blog of the Day Badge