Friday, December 31, 2010

Sweet & Spicy New Year Wishes :)

New year1

Wish all my friends and readers a very happy, cheerful, exciting, fun filled year ahead :)

May all your prayers come true and fill your life with happiness always :)


New year

Have a sweet and spicy 2011 :)


With love,

Monday, December 27, 2010

Garlic Rolls

Photobucket

Its been raining occasions to celebrate :) Hoooorey!!!! this is my hat-trick celebration post :)

Its my 100th post of this year :) and probably the last one for 2010 too :) Though it sounds like a little lazy for 365 days, I'm happy that I made a century this year :)

When the occasion is special, the recipe should be a special one too. Yup!! Garlic rolls have made me drool in dreams and also has been a nightmare for me since I terribly failed making buns last occasion.

This recipe is from Suhaina's blog and was tested enough by my fellow bloggers. :) Pretty popular recipe I guess :) So I was kind of sure that it wont go wrong and gave it a bold try. Special thanks to Sharmilee who encouraged me and cleared my doubts while trying it out ;)

It was a super dooper hit at home and I totally fell in love with its look, aroma and texture :) It was so good to have along with a cup of tea at my Sudoku solving time ;)

I still don't believe that I made garlic rolls at home!!!! Pinch my hand.. oh yeah its true and I am jumping in joy :) Yupeeeeeeeee :)

Photobucket

Ingredients:

All purpose flour(Maida) - 3 cups
Warm water - 1 cup
Yeast - 1 tbl spn
Sugar - 2 tbsp
Salt - a pinch
Olive oil - 2 tbsp
Sesame seeds - 1 tsp

For Garlic spread:

Garlic - 5 pods
Butter - 3 tblsp
Coriander leaves(chopped) - 2 tbl sp
Green chilly - 1
Salt - for taste

Photobucket

Method to make Garlic spread:

Grind the coriander leaves and green chilly into a fine paste.

Mix it along with butter and salt.

Photobucket

Method for making rolls:

Drop the yeast, salt and sugar in warm water and beat until everything dissolves.

Add the sifted maida to the above ingredients and kneed well until you get a smooth dough.

Finally add olive oil and kneed for a while till the dough springs back when you press with your finger.

Leave the dough in a greased bowl and cover it with cling film or wet cloth. Allow it untouched for an hour. The dough will double in size by then.

Now knock down the air in the dough and kneed again for few mins. Divide the dough into two parts and roll it into a rectangle using the rolling pin. The rolled rectangle should be half an inch thick.

Apply the garlic butter on the dough evenly. Now roll it carefully into a log and cut it into four equal parts.

Do the same for the remaining dough too.

Place them into a well greased baking tray or bread loaf tin.

Now apply the remaining garlic butter spread on top of the rolls and also apply some milk on the sides and top to give the rolls the shiny look. Sprinkle some sesame seeds on top of the rolls.

Now leave this along for another 20 mins for it to slightly raise in size.

Preheat the oven to 180°C.


Bake the rolls for 25-30 mins.

Super yummy garlic rolls are ready to eat :)

Enjoy the hot and fresh home made garlic rolls :)

This quantity would make 8 big garlic rolls.

Photobucket

Tips:

You can use half the quantity of maida and replace the remaining half with wheat flour.

You can skip the green chilly to make milder tasting rolls. Or increase the chilly for hotter rolls :)

Eat them hot just after it is out from the oven for best results :)

You can store the rolls for a day or two.

Photobucket

Written by: Nithya
Send in your queries by clicking here.

Thursday, December 23, 2010

Eggless Apple Cake - Christmas Special :)

Eggless apple cake1

Christmas is finally here!! :) The holiday mood is up and there is celebration all around :)

Needless to say my house is smelling of cakes and bakes too :)

This time the cake was for the special person of my life too!!!! awwww stop those guesses!! ;)

It was for the birthday boy... no no.. birthday man - Ahem!! Ahem!! My sweetest Dad :)

Christmas and dad's birthday!!! Aren't they enough reasons to bake a yummylicious cake :) :) Yessss!! Indeed it was.

Apple cake was so damn tasty and the additional attraction was the eggless factor :)

Checkout the double celebration apple cake :)

Eggless apple cake

Ingredients:

Apple - 2
Tutti frutti (finely chopped) - 1/4 cup
All purpose flour(Maida) - 2 cups
Butter - 1/2 cup
Powdered sugar - 3/4 cup
Condensed milk - 6 tsp
Baking powder - 2 tsp
Baking soda - 2 tsp
Salt - a pinch
Vanilla essence - 1 tsp
Cinnamon - 1/2 inch piece
Cardamom - 1
Cloves - 2

Eggless apple cake6

Method:

Sieve all purpose flour, salt, baking powder and baking soda together and keep it aside.

Powder the clove, cardamom and Cinnamon together.

Melt butter and beat in the powdered sugar until it becomes fluffy. Now add the spice powder and vanilla essence to it and beat it until it mixes evenly.

Peel the skin of the apple and grate it.

Add the grated apple and tutti frutti to the batter and beat it for just a min.

Now add the flour mixture and mix until it gets incorporated and forms a thick batter.

Preheat the oven to 180°C.

Line a cake tin with parchment paper and grease it. Pour in the batter into the mould and bake in 180°C for 50-60 mins.

Remove from oven and allow the cake to cool on wire rack for a while.

Invert and decorate according to your wish.


Eggless apple cake5

Eggless Apple cake is ready to eat :)

This quantity makes a 1/2 kg square cake.

Happy making and enjoy eating :)

Eggless apple cake7

Decoration tips:

You can simply place a stencil on top of the cake and sprinkle icing sugar and remove the stencil back carefully.

Sounds simple yet stunning isn't it!!! But I hand made that stencil by cutting out a paper using a knife. ;) ("Now I hear some wooo haaaa's!!! :P)

You can use silver sugar balls to decorate too.

Top with some icing cream.

Eggless apple cake3

Note:

Grate the apples and use them. Do not grind it.

Grate it just when you are going to mix it into the batter. Doing it earlier might turn the apple brown.

You can use other fruits like cherries and dates too.

Add finely chopped cashews, almonds, pistachios etc to make it rich.

If you want your cake dark, add two tsps of caramelized sugar to it. It will give a slight bitter kick to the cake :P

Eggless apple cake2

Written by: Nithya
Send in your queries by clicking here.

Sunday, December 19, 2010

Shortbread Cookies & a reason to celebrate

Photobucket

The Christmas celebration mood is on and I am just enjoying it to the core. I have been getting a lot of baked goodies from friends and craving for more and more :) That too after the Mega Chennai Bloggers meet, I have got a lot of energy to bake and celebrate :)

I also have one more reason to celebrate the day. :) My blog, Fourth Sense Cooking has crossed 100000 hits :)

I would take this occasion to send a lakh thanks to all the visitors of my blog, if not for you all I would have never tried to cook or blog :P I swear! The encouragement in the form of comments, hits, mails and calls make me so cheerful about the whole thing and I enjoy presenting it for you all :) Keep lending me your support and wishes always :)

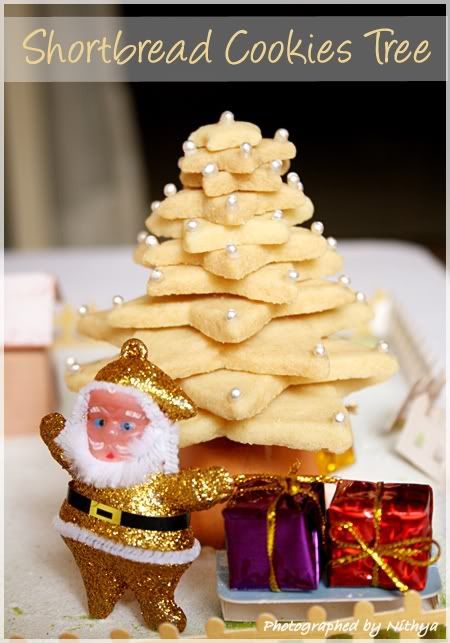
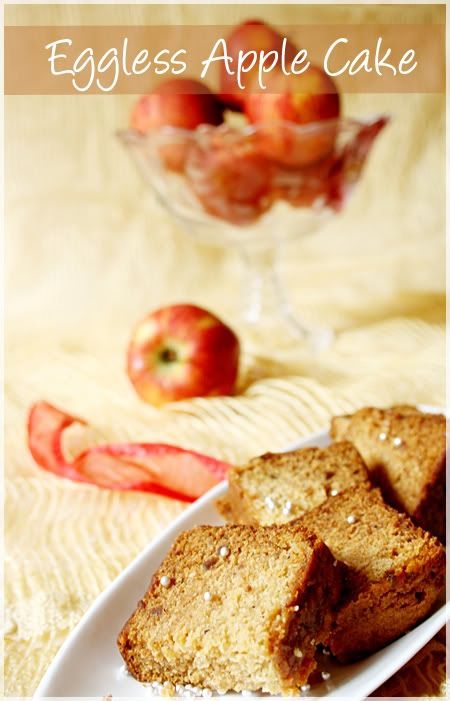
So here is my second post of Christmas treats - The simple and ever versatile shortbread cookies :)

Photobucket

Ingredients:

All purpose flour(Maida) - 1 1/2 cups
Corn flour - 1/2 cup
Butter - 1 cup (Room temperature)
Powdered sugar - 1/2 cup
Salt - a pinch
Vanilla essence / Almond essence - 1 tsp

Photobucket

Method:

Sieve the dry ingredients(All purpose flour, corn flour and salt) and keep it aside.

In a bowl of your electric mixer, beat the butter until smooth and creamy for about a minute. Add the sugar to it and beat until smooth and creamy. Pour the vanilla extract and beat just once. Gently stir in the flour mixture just until incorporated. Now flatten the dough into a smooth disk shape with your hand and wrap in plastic wrap. Chill the dough for at least an hour.

Photobucket

Preheat the oven to 180°C.

Sprinkle some All purpose flour on your working surface and roll out the dough into a 1/4 inch thick rectangle.


Use your cookie cutters to cut out shapes.

Place the cut out cookies on a baking tray and bake for 12-15 minutes, watching closely so that they don’t get too brown. 13 minutes did it perfectly in my convection oven.

Let the cookies cool on wire rack for a while. Initially the cookies might feel a little soft and crumbly to touch but it will harden as it cools down.


Store in air tight containers.

Light, crumbly and melt in the mouth short bread cookies is ready to eat :)

Enjoy making and happy eating :)
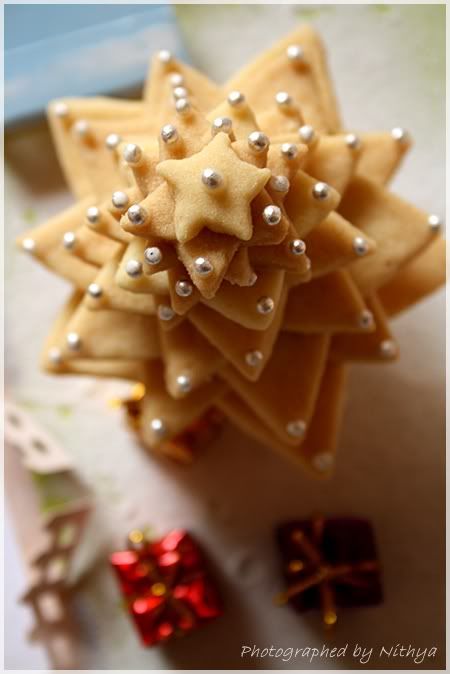
Photobucket

For the Tree:

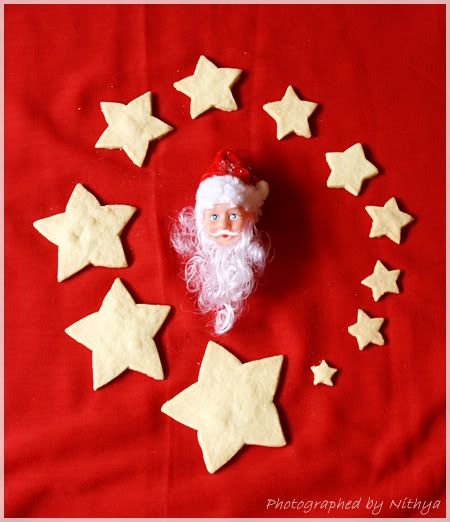
Since I don't have various sizes of star cutters, I cut out different sizes of stars on a paper and placed it over the rolled dough and cut along the outline with a knife.

Mix one tsp of icing sugar with just few drops of water to make it into a paste.

Once you get around 10 gradually increasing sizes of star cookies, just apply a few drops of the sugar paste on the largest star cookie and stick the subsequent sized cookie on top of it. Go on doing the same until you complete stacking the tree :)

Decorate the tree as you like. I applied a drop of the sugar paste on the ends of the cookies and stuck sliver sugar balls :)

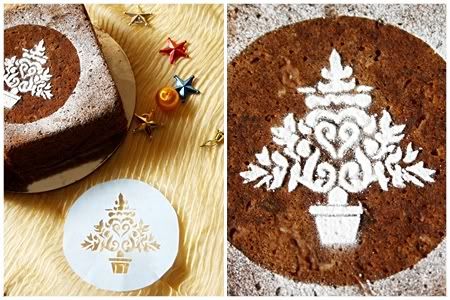
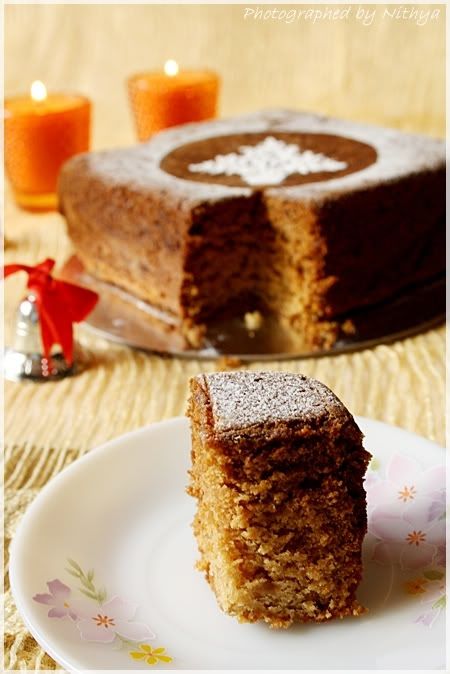
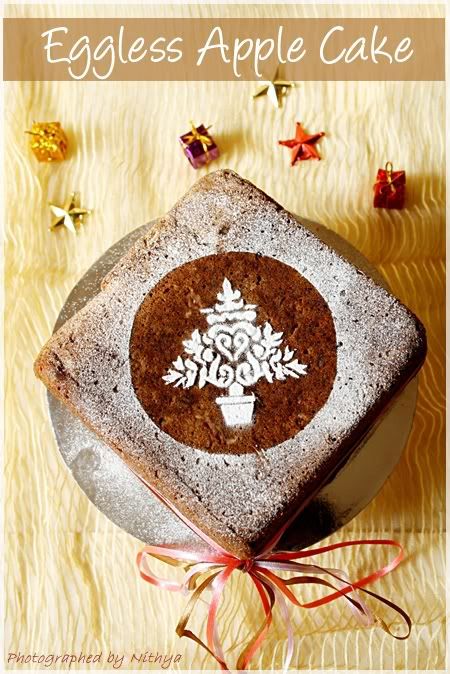
You can even simply sprinkle some sugar powder to give it a snowy look :)
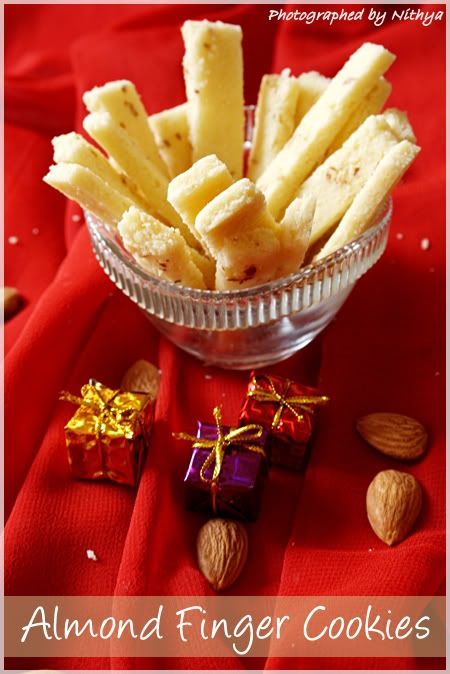
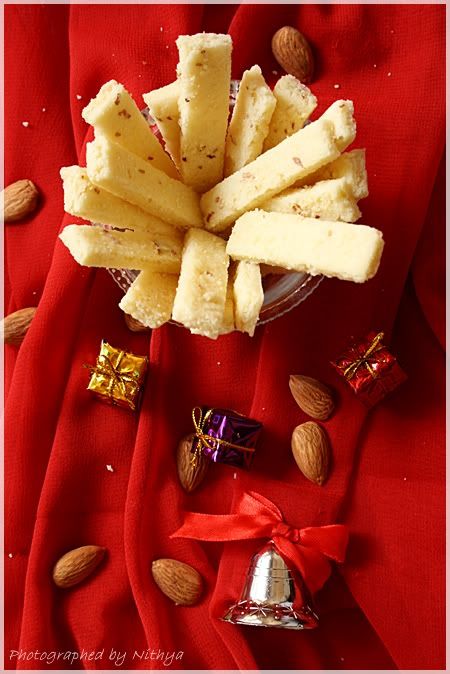
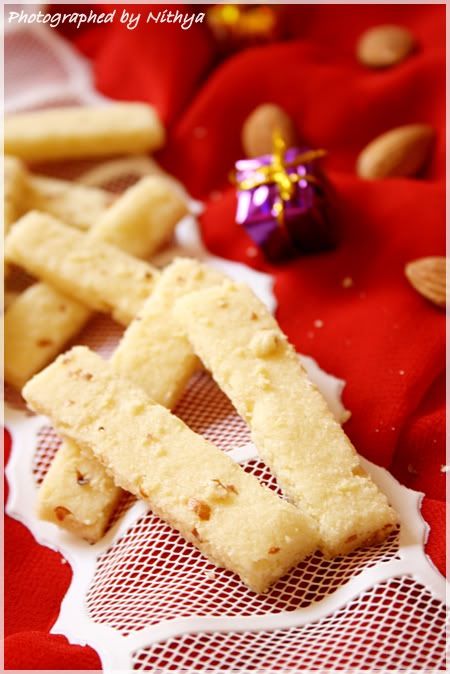
Photobucket

For Almond finger cookies:

Replace the vanilla essence with a tsp of almond essence and follow the same recipe as above.

Roll out a large 1/4 inch circle and sprinkle some ground almond powder on it and just press lightly to fix it with the dough.

Photobucket

Press 1/2 inch lines with a scale or knife to make groves and do the same on the other direction with the measurement of 2 inches to make finger sized cookies.

Bake, allow it to cool and then break them out to separate the cookies.

Photobucket

Tips:

Add cocoa to the same to make chocolate short bread cookies.

You can use instant coffee powder too for flavoring.

You can dip the cookies in melted chocolate.

You can also add few tsps of orange juice or lemon zest to make different flavors. :)

Photobucket

Written by: Nithya
Send in your queries by clicking here.

Sunday, December 12, 2010

Simple Home Made Chocolates

Home made chocolates2

Christmas is around the corner and the fever has set already. I find a lot of cute decorative goods and trees sold at my street end. Thats the advantage of living close to the market which gets so festive every season :)

I love Christmas irrespective of being a Hindu. Its so much fun and frolic. Sharing baked goods, decorating the house and the tree, passing on gifts, playing chris-mom and chris-child game, hanging a star in front of the house and so on. Its so joyful to be a part of it. I have been celebrating Christmas equally grand from childhood. So this year since I have got my hands over the kitchen, I am surely going to try some interesting recipes :) Keep watching!!! :)

The first of the Christmas treats is simple home made chocolates :)

Home made chocolates3

Ingredients:

Cocoa powder - 1/4 cup
Milk powder - 200gms
Sugar - 1 cup
water - 1/2 cup
Butter - 1/4 cup
Vanilla essence - 1/2 tsp
Nuts and raisins

Home made chocolates4

Method:

Take water and sugar in a saucepan and allow it to boil until it reaches 1 string consistency. Remove from fire and add butter to it. Once it melts down, add the milk powder, cocoa powder and vanilla essence. Mix really well until everything blends. Allow it to cool down for few minutes.

Grease your hands slightly with butter. Pinch small portions of the chocolate and roll them into balls.

Refrigerate for a while and wrap them in colored papers or arrange them in gift boxes :)

This quantity would make around 35 small chocolate balls. Anyways it depends on the size and shape you make.

Happy making. Enjoy eating :)

Home made chocolates

Tips:

You can also roll a ball, press it flat and place raisins, almond or pistachio in the center and roll it again to make nutty chocolates.

Roll balls of chocolate and screw in a tooth pic or skewer to make lolly pops :)

Roll chocolate balls and dip them in almond powder and coat it well.

Make chocolate balls and roll them on cocoa powder or sugar powder.

Or simply pour the chocolate mixture on a greased plate and cut them into squares. :)

Home made chocolates1


Sending this post to Kid's delight - Chocolate feast


and also sending it to Chocolate Extravaganza - Monthly Mingle hosted by Ria.


Written by: Nithya
Send in your queries by clicking here.

Friday, December 10, 2010

Jujube / Ber / Elandha pazham Snack

Photobucket

Jujube or Ber or Elandha pazham is a seasonal fruit available in South India.

Jujube bar is one of my all time favorite snack during childhood. I used to totally love the tangy taste of the ready made bars that are available. My grandpa used to send a lot of packs just for me :) Such a nostalgic dish :)

Its a very simple snack that can be made at home within a jiffy. Its been raining cats and dogs at Chennai for the past few days and its unbelievably cold and nice. This jujube snack is a perfect one for such days. :)

Photobucket

Ingredients:

Jujube/Elandha pazham(Small ones) - 1 cup
Jaggery - 1/4 cup
Green chilly - 1
Coriander leaves
Salt - for taste
Mustard - 1 tsp

Photobucket

Method:

Wash and remove the stems of the fruit.

Cut open all the fruits and check for worms and decay.

Once done put them in the bowl(ural) along with jaggery, ground green chilly and salt to it and mash it with a heavy weight rod(ulakai). Finally add the finely chopped coriander to it and mix well. Season with mustard seeds.

You can eat it as it is. This lasts for a week in the fridge.

Photobucket

Note:

You can also make flat balls of it on plastic sheet and dry it under the sun for a week or so turning it now and then. You can store the dried ones for almost three months.

Photobucket

Written by: Nithya
Send in your queries by clicking here.

Wednesday, December 1, 2010

Vanilla Raspberry Yo Yo Biscuits

Photobucket

There are various phenomenons that make me decide on what to make. It could be the hunger or temptation for it or it could be a request from someone, else it could simply be because I need to empty the stock of ingredients I have before their expiry.

This time it was the last reason. I had a good amount of custard powder at home and was wondering what I can try with it. Google guru gave me a big list of recipes and these 'Yo Yo biscuits' excited me a lot. Took down the recipe from 'My diverse kitchen' and was off to bake.

You wont believe, it hardly took an hour for me to do everything. Its simple and yummy. It would for sure please the kid in you :)

These biscuits get the name due to their resemblance to the yo yo toy :)

Its time to treat yourself with home made cream biscuits :) get set go..

Photobucket

Ingredients:

All purpose flour - 1 cup
Powdered Sugar - 1/4 cup
Custard powder(Vanilla flavor) - 1/4 cup
Butter - 125 gms
Vanilla essence - 1 tsp

For the cream:

Butter - 20gms
Icing sugar - 1/2 cup
Custard powder (Raspberry) - 2 tsp

Photobucket

Method:

Sift flour and custard powder and keep it aside.

In a bowl beat butter, powdered sugar and vanilla essence using a electric beater till it becomes fluffy.

Now pour in the sifted flour and custard powder on to the butter sugar mixture and beat on low speed till everything comes together into a soft dough.

Wrap the dough in cling film and refrigerate for fifteen minutes.

Take out the dough and pinch off equal little bits of dough and roll them into smooth balls. Press them a little flat with your palm. Now dip a fork in flour and press it slightly on the biscuits to get the tine marks on top giving it a decorative look.

Place them on lined baking trays.

Preheat the oven to 180°C. Place the try with cookies and bake for 12-15 minutes, watching closely so that they don’t get too brown. 12 minutes did is perfectly in my convection oven.

Let the cookies cool on wire rack for a while. Initially the cookies might feel soft to touch but it will harden as it cools down.

Biscuits are ready.

Photobucket

Beat butter, icing sugar and raspberry flavored custard powder together for a while till they form light and smooth cream.

Sandwich the biscuits with this butter cream and enjoy eating :)

Happy making :)

This quantity would make around 12 to 15 biscuits.

Photobucket

Note:

Be creative and use different flavors of custard powders to make colorful and flavorful biscuits.

If you wish to eat the biscuits as it is, replace the sugar quantity by 1/2 cup and reduce the all purpose flour to 3/4 cup.

You can sandwich the biscuits with jam or nutella spread as well.

If you don't find custard powder, replace it with corn flour. The biscuits would be light brown instead of yellow.

Photobucket

Written by: Nithya
Send in your queries by clicking here.

Popular Posts

Flickr Photostream

www.flickr.com
nits food clicks' items tagged with nitsclicks More of nits food clicks'
Featured on Baking is Hot
my foodgawker gallery
Foodista Drink Blog of the Day Badge