Sunday, June 30, 2013

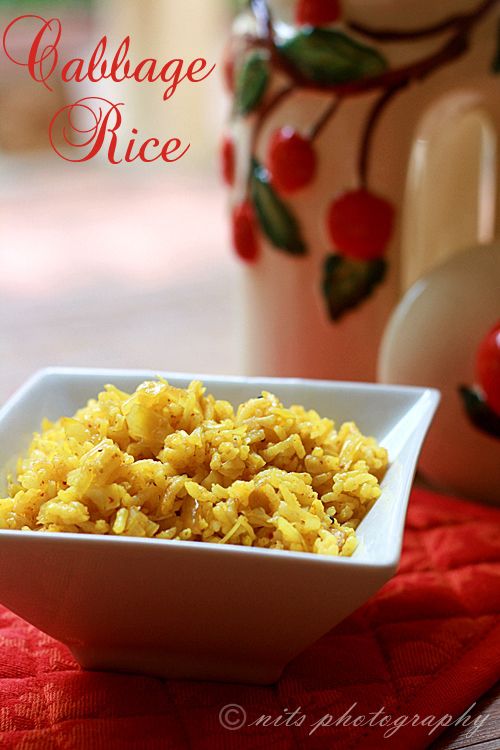
Cabbage Rice - Lunch Box Recipe

 photo Cabbagerice_zps58b76f28.jpg

Life runs on a fast forward mode these days. Infact the 3X fast mode. Gone are the days when women just had to cook and take care of the house. Now we also have careers in various fields and are running behind our dreams. Time becomes very essential and we need to quickly cook healthy food, pack for the lunch and move on with our work. 

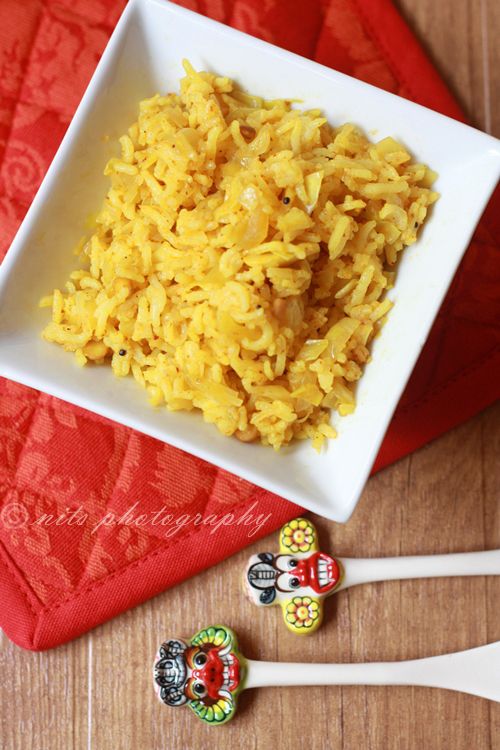
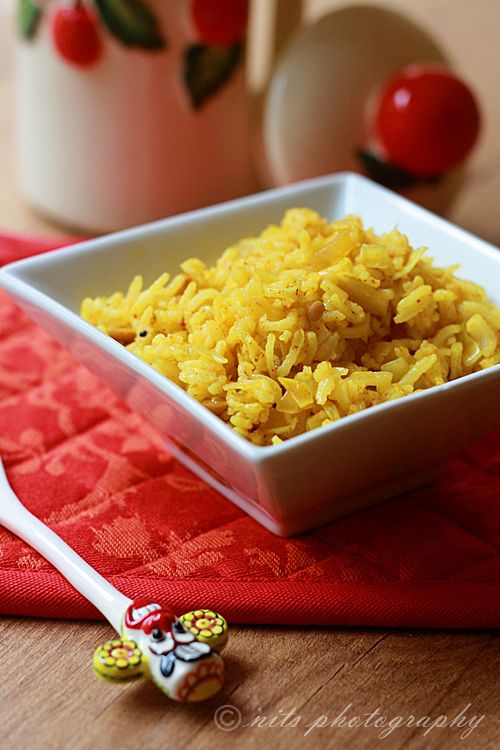
I have been making more of lunch box rice recipes these days to quickly get done with the kitchen chores and get going with work. Here is one such simple version of cabbage rice that will require just 10 mins and no pre-preparation time. 

Likewise I even plan things to reduce on my shopping time and do online shopping these days. Life is made simple with sites like https://www.cuponation.in/ where you find good deals on all products that we need for home :) 

 photo Cabbagerice1_zps5f3c0275.jpg

Ingredients:

Rice - 1 cup
Cabbage (Chopped) - 1/2 cup
Onion - 1
Ginger garlic paste - 1/2 tsp
Garam Masala - 1/2 tsp
Turmeric powder - 1/4 tsp
Chilly powder - 1/2 tsp
Urad Dhall - 1/2 tsp
Channa Dhall - 1/2 tsp
Mustard seeds - 1/4 tsp
Oil

 photo Cabbagerice3_zpsd6b61788.jpg

Method:

Chop onion and cabbage finely. 

Wash and cook rice with 2 cups of water. Once cooked, add a tsp of oil and separate the grains and keep it aside. 

Take a tsp of oil in a pan and crackle mustard seeds, urad dhall and channa dhall. Fry for a min and add ginger garlic paste and saute for 2 mins. Then add chopped onion and cabbage to it. Sprinkle just enough water to cook the cabbage and close with a lid and allow it to get cooked for 5 mins. 

Now add chilly powder, garam masala, turmeric powder and salt and saute for 2 mins until the flavors get infused into the vegetables.  

Finally add cooked rice and mix well. Test for salt and add more if required. 

Quick cabbage rice is ready for packing :)
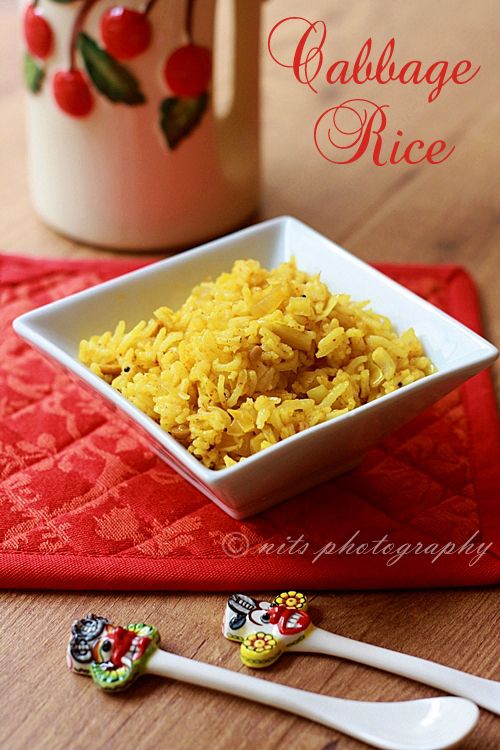
 photo Cabbagerice4_zpsb851eb6b.jpg

Written by: Nithya
Send in your queries by clicking here

Monday, June 24, 2013

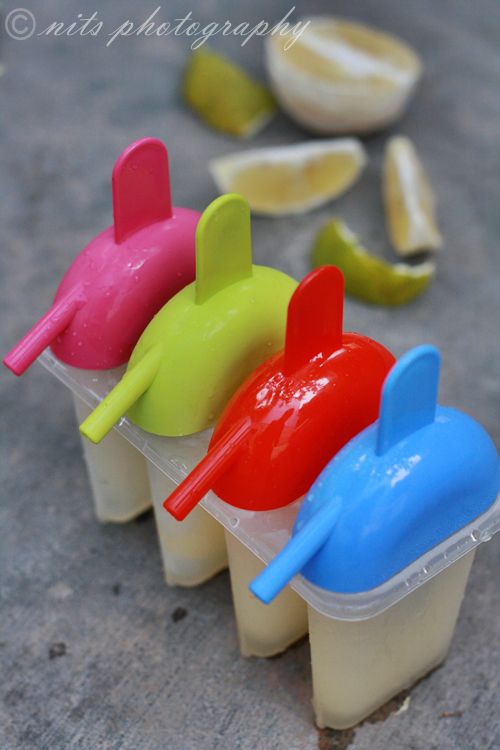
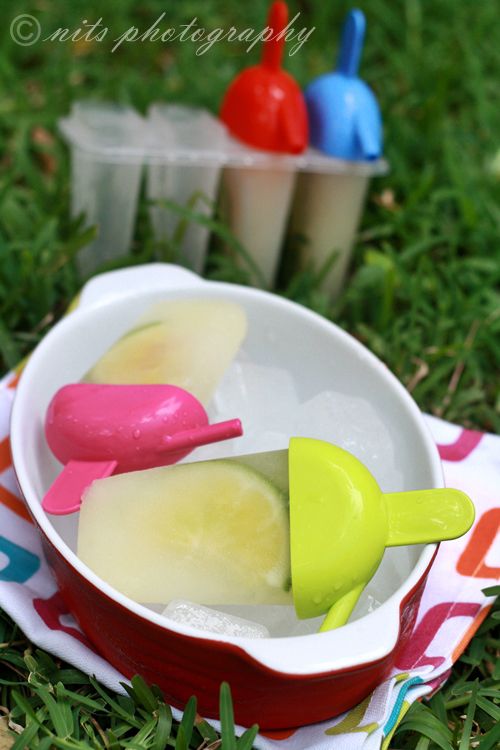
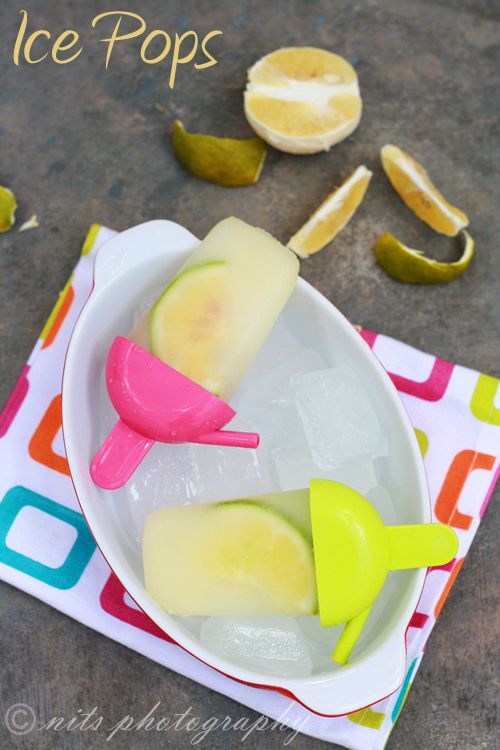
Sweet Lime Popsicles / Sweet Lime Ice Pops

 photo Sweetlimepops4_zpsc60c72df.jpg

Sweet lime or mosambi is a humble fruit that is available almost throughout the year and is less expensive when compared to lot other fruits. 

The juice of this fruit is so light and refreshing that I always prefer drinking it when I go out in the scorching sun. When Chennai never gets its winter and is hot all the time, this popsicle is for sure a delicacy by itself for treating yourself in the mid afternoon. 

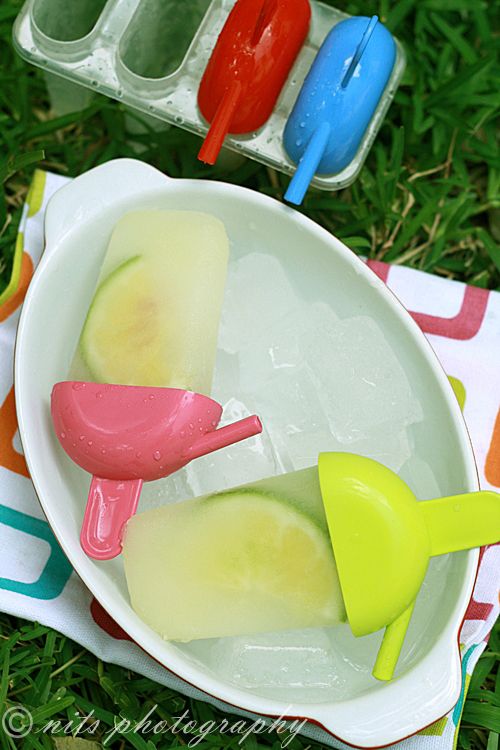
I picked up this fun popsicle mould one fine day last year at Currimbhoys and also made a mango yoghurt popsicle which was so very yummy that it dint even last long for me to blog it. This year made it a point to make something and post. The most interesting thing about this popsicle mould is that the melted juice of the pops doesn't drip out, instead is collected in base itself which can be suck through the straw on the side!!! Interesting isn't it??!!!

 photo Sweetlimepops3_zpsfdd5eede.jpg

Ingredients:

Sweet lime (mosambi) - 3
Water - 1 cup
Ginger - 1/4 inch piece
Honey - 2 tblsp
Mint - optional
Sweet lime slices 

 photo Sweetlimepops5_zps4b5f5511.jpg

Method:

Squeeze the juice of sweet lime and collect it in bowl. 

Grind ginger and some water in a mixer and strain it to get the juice of ginger. 

Mix sweet lime juice along with ginger juice and honey. Try tasting and add more honey if required. 

Slice the sweet lime into thin wedges and place them into the mould on one side of the wall and then pour the juice into it. Close and freeze it for at least 4 hours. 

Serve and slurp :)

 photo Sweetlimepops2_zps438f4e06.jpg

Tips:

Adding a wedge of the fruit to the popsicle makes it look attractive and gives it a body and also the zest of the fruit would make the popsicle delicious. 

Remove the mould from freezer just few mins before serving and dip the mould in warm water which will help loosen the popsicle and easy to remove. 

 photo Sweetlimepops1_zps41e41ca1.jpg

Written by: Nithya
Send in your queries by clicking here

Friday, June 7, 2013

Mango Cheesecake

 photo MangoCheesecake_zpsa717f3c4.jpg

Mango mango everywhere and at my kitchen too :) 

My heart goes for anything made with mangoes! Love the color and the flavor of mango more than any other fruit :) Vibrant bright yellow juicy mangoes are unbeatable :)

This season I was determined to churn up the mango cheese cake that I had bookmarked ages back from one of my favorite bloggers - Anushruthi of divine taste. He mango cheese cake was in my dreams so many days and here it is :) 

I have some slight changes in the measurements from hers and we all at home loved it :) 

 photo MangoCheesecake3_zpsb914fe59.jpg

Ingredients:

For Crust:
Digestive biscuits - 2 packs (1 1/2 cups when crushed)
Butter (melted) - 1/3 cup 
For Filling:
Powdered sugar - 1 cup (Add more if your mango is not sweet)
Thick full cream yogurt - 3 cups
Paneer / cottage cheese cubes- 2 cups
Water - 1 3/4 cups
Chinagrass or Agar Agar  - 10 gms
Mangoes - 2 pureed
For the Mango Glaze:
Mango puree - 1/2 cup
Water - 2 tblsp
Sugar - 2 tblsp
Lime juice - 1 tsp
Method:
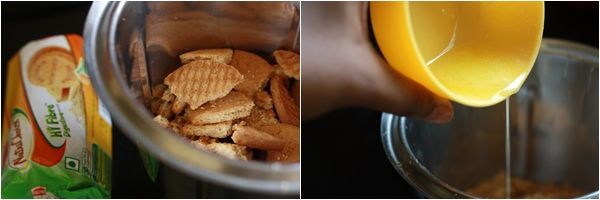
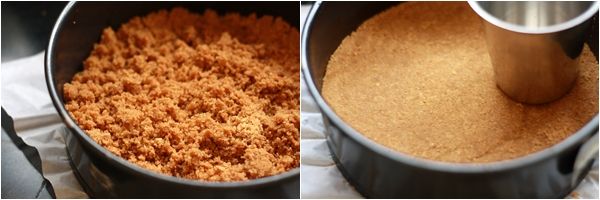
Step 1: Powder the biscuits in a mixie into a coarse powder.  
Step 2: Pour the melted butter on the powdered biscuits and mix with your hands or run it again the mixie for few seconds. 
 photo Step1_zpsde10c094.jpg

Step 3: You need to Fill the pan's base with the biscuit crumbs. 

Step 4: Press it firmly to the base using a glass and chill this in the freezer for 15 mins. 

 photo Step2_zpsb66dfc2f.jpg

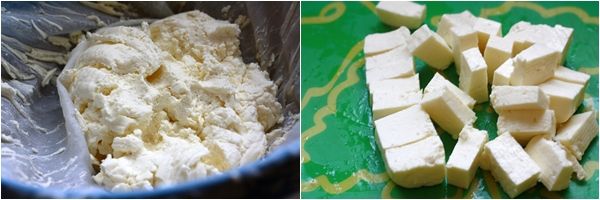
Step 5: Hang the curd in a thin cloth to remove all the water content from it. Leave it for a couple of hours to get thick hung curd. 

Step 6: Chop the paneer into small cubes. Grind the hung curd and paneer together to make a smooth puree. 

 photo Step4-1_zps7730b492.jpg

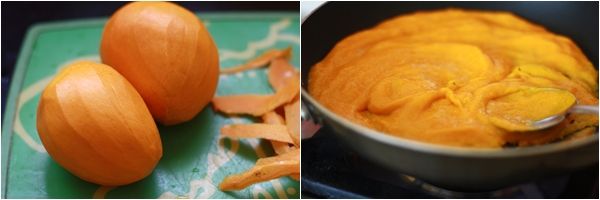
Step 7: Peel, chop and puree two mangoes. 

Step 8: Take the mango puree in a pan and heat it over low flame. Dont boil it.

 photo Step5_zps62eec1a7.jpg

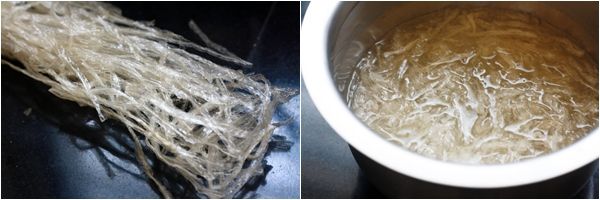
Step 5: Meanwhile chop the china grass sheet into small pieces. 

Step 6: Soak it in 1 3/4th cup of water for 10 minutes and the heat it until they melt completely. 

 photo Step3_zps9327f8c6.jpg

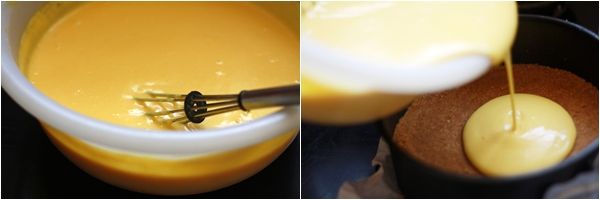
Step 7: Now gently combine the heated mango puree, china grass solution and sugar to the hung curd paneer mixture and beat to get a even creamy textured filling. 

Step 8: Remove the mould from the freezer and pour in the filling and allow it to set in the fridge for 3 hours. 

 photo Step6_zps97ecefe0.jpg

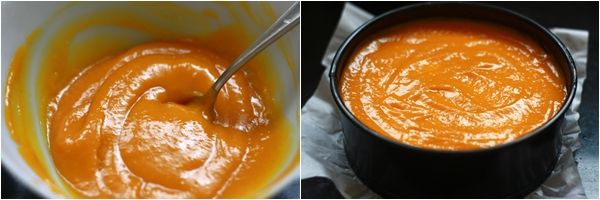
Step 9: Place the mango puree, water, sugar and lime juice in a sauce pan and heat it on medium flame until it becomes slightly thick. 

Step 10: Once the glaze comes to room temperature, apply it on the cheese cake layer and set it again in the fridge for an hour. Decorate as per your choice and enjoy eating. 

 photo Step7_zps7208a7bc.jpg

I used a peeler to get some strips of mango, rolled it and placed it on the cake for decoration. 

 photo MangoCheesecake2_zps4e9a5a1a.jpg

Written by: Nithya
Send in your queries by clicking here

Popular Posts

Flickr Photostream

www.flickr.com
nits food clicks' items tagged with nitsclicks More of nits food clicks'
Featured on Baking is Hot
my foodgawker gallery
Foodista Drink Blog of the Day Badge