Wednesday, July 28, 2010

Apple Cinnamon Tart

Apple cinnamon tart

I'm in Bliss ;) Its absolutely because I could bake something so yummy from scratch. :)

Tart and pies are few of my favorite desserts. The crispy crust with soft and sweet topping makes me melt for them. :)

A tart is a pastry dish, usually sweet, with an open top not covered with pastry. Sweetened fruit is arranged on pastry, often puff pastry, with or without custard, after which the tart is baked in an oven says wikipedia. Wow, tat definition is making me drool :)

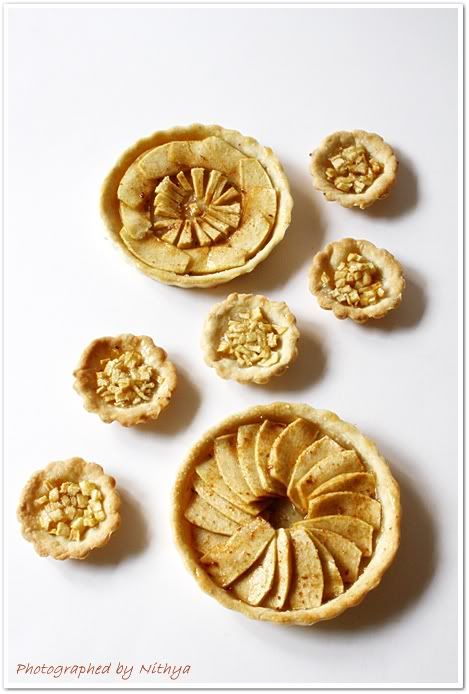
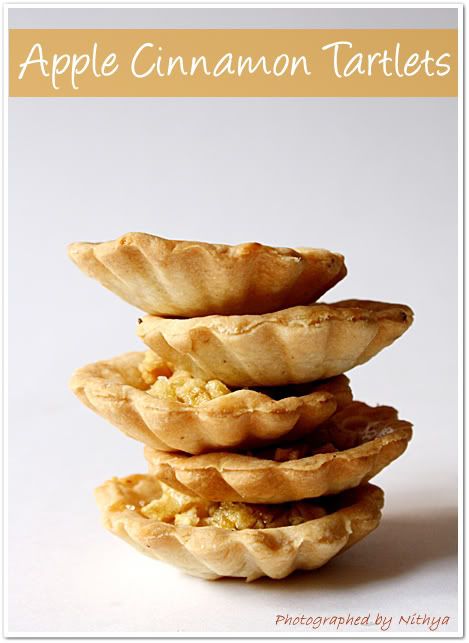
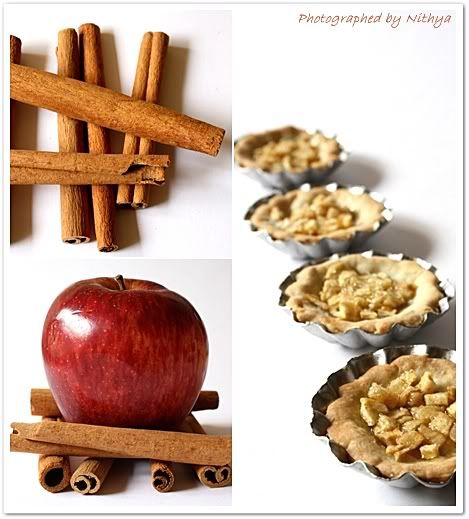
I made two apple tarts and few tartlets. The little ones were so cute and all of us at home enjoyed them. :)

It was total fun to set the apples on top and I thoroughly enjoyed making them. Hope you all would too :)

Apple cinnamon tart5

Ingredients:

For Tart base:

All purpose flour - 1 1/2 cups
Butter - 75 gms
Powdered sugar - 2 tbl sp
Cinnamon powder - 1 tsp
Salt - a pinch

For Topping:

Granny smith apples(green apples) / Red apples - 2
Sugar
Honey
Cinnamon powder

Apple cinnamon tart3

Method:

To make the pastry base from scratch, we need to make the pastry dough.

Sift all purpose flour, powdered sugar and salt together and put them in a mixing bowl.

Cut the cold butter into chunks and add it to the bowl as well. Rub in the butter with your hands till it resembles fine crumbs. Now add just enough cold water to it and mix well till everything comes together into a fine dough. Wrap the dough in cling film and refrigerate for 30 mins.

Roll out the dough on lightly floured surface until it is 1/4 inch thick and slightly bigger than the size of your tart pan.


Grease your tart pan with removable base lightly. Line the base of the tart pan with the rolled pastry. Press the dough at the sides of the pan slowly and then run the rolling pin once on the pan to cut off the excess dough. Chill the lined pan for 15 mins or so to minimize shrinking before cooking.

At this stage you have two options to go about. Either set the toppings on the tart lined pan and bake directly or go for a baking blind method.

Apple cinnamon tart2

Baking at ones method:

Choose fresh green apples(Granny Smith). I dint get them, hence used fresh red apples.

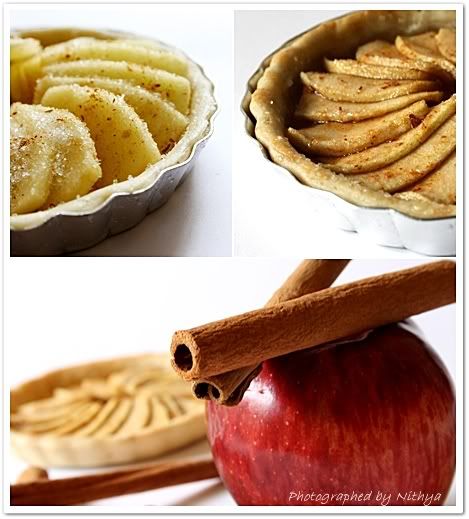
Cut the top and bottom of the apple and peel the skin using a peeler. Now slice them evenly and arrange them as you like on the tart. Sprinkle sugar and cinnamon powder on top of the apples.

Preheat oven to 375°F or 190°C. And place the tart pans on the center rack and bake for 25-30 mins at 190°C.

Cool it on a wire rack for a while and glaze the tart with some honey or apricot glaze. :)


Apple cinnamon tart4

Baking blind method:

This rather strange term really means just to bake the lined tart without topping.

Prick the pastry base with fork to make holes.

Now line it with grease proof paper. Half fill the tin with fried macaroni or baking beans to hold the pastry in shape.

I skipped the above step and just made enough holes so tat the pastry does not raise when baked.

Preheat oven to 375°F or 190°C.

Bake at 190°C for 10-15 mins until the base is dry and crisp with a light golden shade.

Now allow the pastry to cool down for ten mins and then slightly rub with butter and arranged the sliced apples on top. Sprinkle sugar and cinnamon powder and bake for 25-30 mins at 190°C.

Cool it on a wire rack for a while and glaze the tart with some honey or apricot glaze. :)

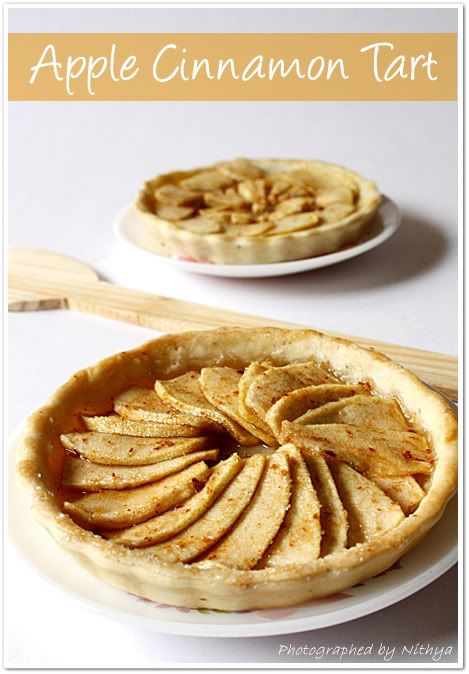
Extremely yummy and simple apple cinnamon tart is ready to eat :)

This quantity would suffice a 9" pan. But I used two 3" pans and few tartlet moulds.

Happy making. :)

Apple cinnamon tart1

I tried both the methods and the crust was pretty different in both.

The direct method gives a slightly softer base with crisp corners and the baking blind method gave me a uniform texture all over. I liked it both the ways ;)

You can check out for a video of this recipe by Chef Chris Thielman here.

Apple cinnamon tart6

Written by: Nithya
Send in your queries by clicking here.


Monday, July 26, 2010

Indian Toast / Bread Bajji - Diet Version

Bread bajji5

You would always need some handy quick fix recipes to fulfill the 4 PM tummy grumbling. Mostly people end it up by having a cup of coffee and munching some fried snacks. But I am a no coffee, no tea person and I am not for fried items too. So a healthy salad, or a non fried snack is what I keep looking for.

Its a bajji that is roasted on a pan and not deep fried :) Wow, so isn't it a diet version??!!

Crispy and spicy crust with soft and subtle bread makes me say ummmmm :)

Bread bajji

Ingredients:

Bread - 10 slices (Salted or sandwich)
Chickpea flour(Besan / Kadalamaavu) - 1 cup
Rice flour - 1 cup
Chilly powder - 2 tsp
Onion - 1
Ginger - 1/4 inch piece
Garlic - 5 pods
Salt - for taste
Lemon juice - few drops

Bread bajji4

Method:

Cut the ends of the bread and slice them diagonally to make triangles.

Grind onion, ginger and garlic together into a fine paste.

Take a large flat bowl and mix in the besan, rice flour, salt, chilly powder and the ground ingredients by adding some water into a thick paste (like bajji batter). Finally add few drops of lemon juice and mix it well.

Heat a pan or skillet. Dip the bread into the batter on both the sides and roast them on the hot skillet by adding few drops of oil to it. Remove from pan when it is roasted golden brown on both the sides.

Serve it hot with tomato ketchup. Yummy and light bread bajji is ready :)

Happy making :)

Bread bajji2

Note:

You can replace besan flour with corn meal flour as a variation.

Add chillies while grinding the onions to give the extra spice.

Deep fry them if you are not diet conscious.

Bread bajji1

Written by: Nithya
Send in your queries by clicking here.

Thursday, July 22, 2010

Creamy Muttar Paneer

Muttar Paneer1

Cottage cheese or Paneer as it is called in India has a very high protein content and is a rich source of calcium too. I simply love paneer in any form. Be it in subzi or as kadai panner etc. You name it and I like it ;)

Flat breads like roti and chapathi play a very integral part in our Indian cuisine. But what makes them tasty is the spicy accompaniments like korma or subzi. :)

Since we dine chapathis every night, I look our for variety always. Muttar paneer is one super good subzi that I simply love to have.

The subtle spice, rich cream, paneer's texture, the chunky onions and the aromatic coriander finish makes it simply the best side dish ever :)

Muttar Paneer2

Ingredients:

Green Peas - 1 cup
Paneer - 1 pack (200gms)
Cashew nuts - 6 nos
Tomato - 1
Onion - 2 + 1
Ginger - 1/4 inch piece
Garlic - 5 pods
Curd - 1/2 cup
Chilly powder - 1 tsp(or more according to taste)
Turmeric powder - a pinch
Salt - for taste
Coriander leaves

Muttar Paneer3

Method:

Dice paneer into cubes and shallow fry them until they turn golden brown. Cook peas and keep it aside.

Take 2 tsps of oil in a pan and saute roughly chopped onions(2 nos), ginger garlic paste, tomatoes and cashews. Sprinkle some water and cook it for few mins. Allow it to cool and grind into fine paste.

Take a pan and add 2 tsps of oil and put in the cumin seeds and the ground paste. Fry for few mins and add finely chopped onion and saute again. Add chilly powder, coriander powder, turmeric powder and salt to it and mix well. Add the cooked peas and adequate water to make the gravy and let it boil for another five mins. Reduce the heat and add curd and fried paneer to it and cook for few mins. Finally garnish with chopped coriander leaves.

Serve hot with chapathi, roti or any indian bread :)

Happy making. Enjoy eating the rich creamy muttar paneer :)

Muttar Paneer

Written by:
Nithya
Send in your queries by clicking here.

Monday, July 19, 2010

Eggless Banana Muffins

Eggless Banana Muffins2

Muffins or the so called cup cakes in India have always fascinated me. I still remember the days when I used to carry them to school in my pink hippo lunch box for snacks break ;)

Since the day I got into the kitchen, I have always wanted to bake them at home. My dream came true today. :)

I love bananas so much and the flavor of it in anything will make me enjoy it to the most. This pretty looking muffins are no exception. The egg-less factor made it all the more interesting for people at home too. :)

Mom and grandma enjoyed having them :) I am truly elated today!!!!

Eggless Banana Muffins5

Ingredients:

Banana - 4
Vanilla essence - 1/2 tsp
All purpose flour (Maida) - 1 1/2 cup
Sugar - 3/4 cup
Melted butter - 1/3 cup
Baking soda - 1 tsp
Baking powder - 1 tsp
Cashews - 5
Salt - a pinch (avoid this if you are using salted butter)

Eggless Banana Muffins3

Method:

Mash ripe bananas well. Chop the cashews and reserve two tsp of it separately. Combine maida, baking soda and baking powder and sift it.

In a bowl, combine the melted butter and sugar. Add the mashed banana and vanilla essence and mix ones. Now add the sifted dry ingredients, chopped cashews and mix just enough to combine everything. Do not over mix. The consistency should be like thick batter.

Preheat oven to 375°F or 190°C. Line the muffin tray with liners.

Fill muffin cups upto 3/4th and top it with some chopped nuts that you reserved.

Bake it for 20 mins at 375°F or 190°C.

Truly yummylicious egg-less banana muffins are ready to eat :)

This quantity makes 12 soft muffins.

Enjoy making it just like what I did ;)


Eggless Banana Muffins4

I use a LG microwave oven with convection mode to bake. It works really well in convection mode. You can preheat just like a normal oven and use metal molds in that mode. Use the high rack that comes with your oven to bake cakes and muffins.

Eggless Banana Muffins

Note:

Choose well ripen bananas for making these. Green ones are the best.

Since bananas turn brown, mash them just before use for best results.

If your banana is kind of dry and if your batter turns too thick, just add few tsp of water and mix well to bring to the right consistency.

Eggless Banana Muffins1

This goes to PJ who is hosting MEC-Favourites which is an event that was started by Srivalli of Cooking for all seasons.

Written by:
Nithya
Send in your queries by clicking here.

Friday, July 16, 2010

Sweet Corn Pulao

Sweet corn pulav6

Sweet corn is one other ingredient which falls in 'most favorite' category for a lot of people. And yes!!! I am one among them.

As soon as I saw corn at home my mind started dreaming of masala corn, roasted corn, butter corn, corn pulao, corn soup, grilled corn etc etc.. the list goes on and on. :) Finally after a lot of fight between the heart and mind, I decided what my tongue wanted. It was corn pulao this time :)

There are loads of ways you can make corn pulao and this is one super good version of it :) I simply loved it and the aroma spread across the house in fraction of a second pulling all of them right to the dining table. :)

Here is my version of sweet corn pulao just for you :)

Sweet corn pulao

Ingredients:

Rice - 1 cup
Corn - 1 1/2 cups
Onion - 1 large
Bay leaf - 1
Cinnamon - 1/4 inch piece
Cloves - 2
Water - 2 cups

To grind -

Cashew nuts - 10
Tomato - 1
Ginger - 1/4 inch
Garlic - 4 pods
Coriander leaves - 1/2 cup
Green chillies - 3
Garam masala - 1 tsp
Cinnamon - 1/4 inch piece
Cloves - 2

Sweet corn pulao2

Method:

Cook corn and keep it aside. Wash rice and soak in water for a while. Slice the onions into very thin slices.

Grind Cashew nuts, tomato, ginger, garlic, coriander leaves, green chillies, garam masala, cinnamon and cloves together into a fine paste adding very little water to it.

Take 4 tsps of oil in a pressure pan and add the cinnamon, clove and bay leaf to it. Saute for few seconds and add the onions to it. Saute till they become transparent. Now pour in the ground mixture and mix well for few mins. Strain the water away from the rice and add it to the pan along with cooked corn. Saute it for another few minutes. Finally add salt and 2 cups of water to it and cook until 3 whistles.

Sweet corn pulao is ready to serve.

You can serve this along with onion raitha or potato chips. :)

Enjoy eating :)


Sweet corn pulao3

Note:

You can replace coriander leaves with mint leaves to have a minty flavored corn pulao.

If you like your pulao spicy, add few tsps of white pepper to it.

Sweet corn pulao4

Written by:
Nithya
Send in your queries by clicking here.

Wednesday, July 14, 2010

Broccoli Stir-Fry

Broccoli Stri Fry3

It always makes us feel the food is healthy when it shows a shade of green in it. Its not just a feeling but its true too. Broccoli is a very healthy vegetable.

I used to call it green colored cauliflower, but recently came to know that they belong to cabbage family. May be elder brother ;)

Wikipedia says that broccoli is high in vitamins C, K, and A, as well as dietary fiber. It also contains multiple nutrients with potent anti-cancer properties, such as diindolylmethane and small amounts of selenium. A high intake of broccoli has been found to reduce the risk of aggressive prostate cancer. Broccoli consumption has also been shown to be beneficial in the prevention of heart disease.

Wow so if a small green veggi can prevent us from Cancer and heart disease!! Why not include them in our diet chart. :)

Simple stir fry is the best that can be made with the green veggie since it does not have to be cooked much and it maintains the original taste of broccoli.

Broccoli Stri Fry4


Ingredients:

Broccoli - 1 medium sized
Olive oil / Ghee - 1 tblsp

Garlic - 5 pods

White Pepper - for taste

Salt - for taste


Broccoli Stri Fry

Method:

Cut the broccoli into florets and cook them in microwave. I prefer microwave for broccoli since it preserves the color better than cooking on stove top.

Peel off the skin from garlic and slice them very thin and keep it aside.

Heat a frying pan or wok over medium heat. Add olive oil / ghee and once it gets heated up, put in the sliced garlic and fry for few mins till they get roasted slightly. (I like them a little crisp). Now add the cooked broccoli and saute for few mins. Finally add salt and white pepper to it.

The flavor of garlic and olive oil gets marinated into the broccoli resulting in a very aromatic stir fry. :)
Simple isn't it??!!

You can eat it just like that or serve it with ghee rice.


Enjoy making a healthy stir fry. :)

Broccoli Stri Fry2

Note:

When buying broccoli look for firm ones with compact clusters of small florets. The buds should be dark green and may have a purplish tint to the edge which does not matter.

If the florets are opened, yellowish-green or enlarged then the broccoli is not fresh. Prefer not to buy them.

Try and buy your broccoli just before you need it. You can store broccoli in the fridge, in an open plastic bag, for up to three days, but the vitamin content will diminish the longer you leave it.

Broccoli can be boiled in a small amount of water on stove top, microwaved with almost no water or steamed on a rack above simmering water, or stir-fried.

Be sure not to overcook broccoli or it will turn too mushy and will develop into a very unappealing shade of green as well.

Broccoli Stri Fry1

I am happy to send this post to the Food Palette Green event :)


Written by: Nithya
Send in your queries by clicking here.

Monday, July 12, 2010

Vegetable Eggs

Vegetable eggs6

Vegetable Eggs????!!!!!! Yes, don't they sound and look interesting?! :)

Vegetables are very essential intake in everyday food. But I am sure you would agree that its hard to make kids eat them. All you can do is to make something interesting out of them and give it a very attractive name as well, so that the kids would be excited to eat them :)

That is exactly how vegetable eggs impressed me when I was a kid and till date it has been the same. ;)

Crispy bread covering a hot and tangy filling along with tomato ketchup can make your evening a yummylicious one for sure :)

Vegetable eggs5

Ingredients:

Bread slices

Potatoes - 3 large
Carrots - 2
Onions - 2
Peas - 1 cup
Cumin seeds - 1/2 tsp
Aamchur powder - 1 tsp
Garam masala powder - 2 tsp
Chilly powder - for taste
Turmeric powder - a pinch
Salt - for taste
Coriander leaves

Vegetable Eggs4

Method:

Cook the potatoes, peas and chopped carrots. Dice onions finely.

Add few tsps of oil in a pan and add the cumin seeds, once it splutters add the diced onions and saute till it turns golden brown. Mash the cooked potatoes and put then into the pan along with other cooked vegetables. Add salt, garam masala, chilly powder, turmeric powder and aamchur powder to it and mix well till every thing blends. Finally add the finely chopped coriander leaves too.

The stuffing is done. :)

Roll out small balls of the stuffing and keep it aside. Take a slice of bread and cut away all the four ends.

Take a bowl of water and dip the bread in it and immediately remove it and press it between your palms to remove excess water. Now place a ball of the filling in the center of the bread and cover it nicely. Now fry these balls in oil till they turn golden brown.

Crispy and yummy vegetable bread eggs are ready to eat :)

Serve it hot with tomato ketchup. A perfect match for a lovely evening snack.

The above quantity would make 20 small sized vegetable eggs :)

Enjoy making and happy eating :)

Vegetable Eggs1

Note:

Use ginger garlic paste if you like the flavor.
You can also replace aamchur with lemon extract.
You can use cauliflower or cabbage instead of potatoes and also use beans, beets etc too. The filling is left to your creativity. :)

Vegetable Eggs
Decoration: Used peni(the Karnataka based sweet base) to make the nest. ;)

Written by: Nithya
Send in your queries by clicking here.

Thursday, July 8, 2010

Color Mania - A Quick Look

color mania


Color Mania - this concept was not a preplanned one. It all just happened on a day when Purple cabbage came home :) It invoked my love for colors and food.

For me its not enough if the food is yummy, but it has to be attractive too. Dull looking food never makes me drool. Mom used to make my food look attractive ever since I was a toddler because I fuss for food. Decorating my plate and then getting self impressed with it before consuming it is my hobby ;)

Once color mania concept came to shape, I had to do a lot of research on what to make and how to make it. Most of the colors were breezy to make and was instantly available, but few were real mind boggling ones.

And if you had noticed, the ten colored food fall under different categories and genres of food. There are no repetition of dishes. I was keen on presenting different food in different colors.

Since it was all about colors, I enjoyed putting together some facts about the color in my posts as well. :) Oops, never had a clue that there were so much about it :)

I should thank my friends and my family for helping me to figure out lot of things and plan up with the recipes. Thanks all :)

1# Purple Cabbage Rice - Incorporated ground cabbage extract along with rice to bring in the rich purple shade to the rice. It was not just colorful, but was extremely tasty too. :)

Purple cabbage rice4

2# Mango Sorbet & Pops- Yellow yellow yummy fellow :) Mango being the seasonal treat was used for making simple fruit sorbet and pops that the summer demands. :)

Mango Sorbet1

#3 Pink Poori - Beets being the key ingredient made my poori blush with pink shade :) Healthy, colorful and tasty pooris were damn attractive too.

Pink poori1

#4 Chocolatey Mochaccino - Chocolate + Coffee can never go wrong na!! The simply fantastic combination is best to kick start a day :)

Chocolatey Mochaccino2

#5 Hibiscus Squash - Blood red with an unusual twist was this hibiscus squash. A flower delight simply gorgeous and pretty. :)

Hibuscus Squash1

#6 Orange Salad - The truly orangey combination of Carrots, Papaya & orange made into a sweet as well as spicy salad fulfilled an evenings hunger bite :)

Orange Salad4

#7 - Cream of Cashew Almond Soup - A peaceful white soup made with richy rich cashews and almonds can even supplement a meal. :)

Cream of cashew almond soup3

#8 Tropical Avocado Cream - A pleasant green avocado cream can satisfy a sweet tooth for sure. Top it for a muffin or tart and enjoy the green treat :)

Tropical Avocado Cream1

#9 Blue curacao Jelly & Blue Lagoon - A perfect cool blue dessert to end a lovely dinner. Freak your guests and kids with a blue lagoon mocktail.

Blue Curacao1

10# Black Bean Salsa & tacos- Yummy Mexican snack with black beans salsa and cheese can make you ask for more. Truly drool worthy :)

Black bean salsa

Note: Click on the colored dish titles or the pictures to go to the corresponding posts with recipes and more pics.

Introducing Top Tip - Tip Top section on the top right column. Keep an eye!!! :)

I am sending Purple cabbage rice, Mango Sorbet and pops, Pink poori, Blue curracao Jelly and Tri colored idly to Srivalli's "Kids delight" event.


Written by:
Nithya
Send in your queries by clicking here.

Popular Posts

Flickr Photostream

www.flickr.com
nits food clicks' items tagged with nitsclicks More of nits food clicks'
Featured on Baking is Hot
my foodgawker gallery
Foodista Drink Blog of the Day Badge