Showing posts with label International Food. Show all posts

Thursday, February 6, 2014

Apple Pie

 photo Applepie2_zpse1bcf865.jpg

Apple pie for dessert can keep your stress away! How about that new saying!! LOL :P but it did for me. Things have been a bit busy and stressed in life for me and I am trying to break them all by baking some goody godly stuff now and then. This one for sure was a hit and made my day!

The completely warm and delicious dessert can for sure melt hearts and make you say a mmmmmm :) Its actually pretty easy to make to and wouldnt fail. Ofcourse the lattice strip pattern part is a bit challenging for beginners, its still worth a try and looks pretty decent and who cares if it taste all so great :P

 photo Applepie1_zps5029b62f.jpg

Ingredients:

For Sweet pastry dough:

Maida - 360 gms
Icing Sugar - 180 gms
Butter - 180 gms
Eggs - 72 gms

For Apple filling:

Apples - 3
Brown sugar - 4 tblsp
Butter - 4 tblsp
Cinnamon powder - 1 tsp
Cake crums - 1/2 cup

 photo Applepie3_zpsd049982d.jpg

Method:

Pastry dough:

Take the maida and icing sugar in a mixing bowl. Chop the cold butter into small chunks and drop them into the bowl. Put your hands into work and mix them until it resembles crumbs. 

Now add the beaten egg and work quickly to bring them all together into a dough. Dont work too much on it. Just mix it all and bring them together. Cling wrap and chill for an hour. 

Apple filling:

Peel and chop apples into small pieces. Take in a large pan and add the sugar and butter to it. Mix well until the sugar melts and the apples get cooked a little. Now add the cinnamon powder and cake crumbs and mix well. Remove from flame and allow it to cool. 

Roll the pastry dough into a large circle of 1/4 inch thickness. Carefully line the pie base and cut the extras. Poke holes on the base using a fork. 

Now spoon in the filling on the pie base and spread evenly. 

Roll remaining pastry, cut into 10 strips, each about 1/2 inch wide. Place 5 strips across filling in pie plate. Weave a cross-strip through by first folding back every other strip of the first 5 strips. Continue weaving, folding back alternate strips before adding each cross-strip, until lattice is complete. Trim ends. 
Egg wash the pie. 

Preheat the oven to 350°F or 180°C. 

Transfer the batter to the baking pan and bake at 180°C for 45 - 50 mins or until the pie looks golden brown. 

Serve warm and enjoy eating :)

 photo Applepie_zps07c449e9.jpg

Written by: Nithya
Send in your queries by clicking here. 

Tuesday, February 5, 2013

Aglio Olio Pasta

Photobucket

Nothing can make you feel more satisfied than making a dish from scratch. I made the simplest of pastas Aglio Olio Pasta with homemade angel hair pasta.

My priceless possession – pasta rolling machine bought at Italy has been put to decently good use ever since I bought it but just realized that I dint post any recipe that I made using them!!! Sometimes it just happens that I get so overwhelmed by the taste that I completely forget to take pics of the dish :(

I shall surely post the recipe of pasta from scratch as soon as possible. That's a promise! :)

Photobucket


Ingredients:

Angel hair pasta / spegatti - 300 gms
Garlic – 6 pods
Olive oil – 2 tblsp
Dry red chillies or chilli flakes
Water to boil the pasta
Salt – for taste

Method:

Step 1: Chop garlic into fine pieces.

Step 2: Measure your homemade pasta or use the store bought angel hair pasta or spaghetti. 


Photobucket


Step 3: All your need next is the olive oil and chilly flakes. I used extra virgin olive oil that I picked up at Italy. 

If you are using dried whole red chillies then chop them finely. I used ready chilly flakes instead. 

Photobucket


Step 4: Boil 2 ltrs of water with some salt and oil added to it. Put the pasta into the water and cook. It took just 3 minutes since I used freshly homemade pasta. It might take upto 10 mins if you use store bought dried pasta. 

Step 5: Drain the water and keep it aside. 

Photobucket

Step 6: Take olive oil in a large pan and saute the finely chopped garlic and chilly flakes. 

Step 7: Add the cooked pasta and toss until it is well mixed. 

Photobucket


Step 8: Serve hot and enjoy eating. 

You can add some crushed pepper too to make it spicy but bet on me it tastes awesome as it is!

Photobucket

Written by: Nithya
Send in your queries by clicking here. 

Monday, September 24, 2012

Hummus - Mediterranean Dip

Photobucket

Mediterranean cuisine comprises of food from 21 countries that surround the Mediterranean Sea such as Italy, France, Spain, Greece, Egypt, Turkey, Levant (Cyprus, Jordan, Lebanon, Palestine, and Syria), and various other countries adjacent to the Mediterranean sea. 

So many countries and so much variety isn't it :) One of the first few dishes I tried from the Mediterranean cuisine was this humble dip called Hummus. Its is simple to make and simply delicious to eat. It goes great with freshly made pita breads. 

My attempt of pita bread dint work great this time hence I simply bought a pack of French brown bread and enjoyed my hummus :)  

I'm sure you would get tempted to try it out too after you go through the simple ingredients list :)

Photobucket

Recipe adapted from My Jhola. 

Ingredients:

Chickpeas (Channa) - 1 cup
Sesame seeds - 1 tblsp
Sesame oil - 1/2 tblsp
Garlic - 4 pods
Lemon juice - 1 tblsp
Olive oil - 1/4 cup
Salt - to taste
Cumin seed powder and chili powder to sprinkle on top

Photobucket

Method:

Soak chickpeas in water over night. 

Cook the soaked chickpeas until tender. 

Dry roast the sesame seeds until light brown. Allow it to come to room temperature. 

Now grind chickpeas, sesame seeds, olive oil, sesame oil, garlic, lemon juice and salt together into a smooth paste. 

Hummus is ready to serve. 

Collect the hummus in a large serving bowl, make a well in the center and add olive oil liberally and sprinkle cumin seed powder and chilly powder. Serve with hot pita bread or any bread of your choice and enjoy :)

Photobucket

Tips:

If you have ready made tahini you can simply skip using sesame seeds and sesame oil and replace it with 2 tblsp of tahini to make your hummus. 

You can store hummus in an air tight container for about 10 days if kept in the fridge. 

Photobucket

Written by: Nithya
Send in your queries by clicking here. 

Thursday, November 24, 2011

Fusilli Pasta In White Sauce

Pasta1

Pasta is my favorite Italian dish after Pizza. I enjoy every variation of pasta and especially the creamy white sauce base is damn yummy :) I don't mind licking my plate and finger after a delicious pasta :)

If you have a similar taste, just go ahead and try this out :)

Pasta4

Ingredients:

Fusilli pasta - 2 cups
Beans - 50 gms
Carrot - 2
Spinach - 1/2 bunch
White sauce
Oregano - 1 tsp
Pepper - for taste
Salt - for taste
Mozzarella Cheese – 3/4 cup

For white sauce -

All purpose flour (Maida) – 4 tbsp
Butter – 4 tbsp
Milk – 3 cups
Salt

Pasta

Method:

Add pasta to boiling water and cook for 5 mins. Strain and wash with cold water and keep it aside.

Dice beans and carrots into long pieces and cook them in microwave. Clean, chop and cook spinach.

To make white sauce - Dilute the maida in milk and mix it thoroughly without lumps. Melt the butter in a pan. Simmer the stove, pour in the diluted milk mixture and stir continuously until the sauce thickens. Finally add salt and mix well.

Now take a pan and add the cooked vegetables, spinach and pasta. Pour in the prepared white sauce and cook for five mins. Add oregano, salt and pepper to it mix well.

Transfer this to a baking dish and sprinkle the grated cheese on top and grill in an oven till the cheese melts down.

Serve hot and enjoy eating :)

Pasta3

Written by: Nithya
Send in your queries by clicking here.


Thursday, October 13, 2011

Vegetable Cheese Pizza - From Base

Photobucket

I feel really great when I make some unusual dish (other than south Indian) at home from the base. It gives a sense of achievement and an opportunity to put the collars up when people exclaim "you made it at home???" :P

One such celebrated dish is Pizza. Making it at home right from the base is really exciting and delicious too :)

For heaven sake, pizza came out really well at the first go itself and I've been baking it quite a lot of times since then. I have tried different toppings for my pizza but nothing can beat the simple vegetable cheese version :)

pizza3

Ingredients:

For the bread base -

All purpose flour(Maida) - 1/2 kg
Instant yeast - 15 gms
Butter - 10 gms
Sugar - 30 gms
Salt - 10 gms
Water

For pizza -

Pizza Sauce
Tomato - 2
Baby corn - 10 cobs
Red bell pepper - 1
Green bell pepper - 1
Yellow bell pepper - 1
Onion - 1
Paneer - 200 gms
Italian seasoning (Herbs)
Mozzarella cheese
Chilly flakes

pizza4

Method:

For the bread base -

Take the maida in a large mixing bowl or simply pour it over your work surface. Make a large well in the center. Put sugar, salt and instant yeast in the center of the well. Add luke warm water to the yeast, sugar and salt mixture and mix well with your hands until the yeast becomes frothy and dissolves completely.

Now gradually push the maida into the yeast mixture and start kneading. Add adequate water to make soft and smooth dough. Knead well for 20 mins incorporating air bubbles. Add melted butter to the dough and kneed well until well incorporated.

Rest the dough for 1 hour covering the bowl with cling film or wet towel. The dough would raise to double its volume.

After an hour, knock down the air in the dough and divide the dough into three parts.

Flour the work surface and roll a ball into a flat disk of desired thickness(depends on how thick you like your pizza crust to be) Prick holes with fork. Place on greased tray and let it raise for another 10 mins.

Preheat the oven to 210 °C and bake for 10 mins.

Allow it to cool on wire rack. Cover and store in the fridge until use.

This quantity would make 3 medium sized bread bases.

pizza5

Method:

For vegetable cheese pizza -

Place the bread base on the baking tray.

Spread two tblsp of pizza sauce on the base evenly.

Arrange the baby corn, paneer cubes, diced onion, tomato and bell peppers according to your favorite pattern and sprinkle grated cheese generously over the pizza.

Microwave it at maximum temperature for 3 mins or until the cheese melts completely.

Serve topped with Italian herbs and chilly flakes.

Enjoy the sizzling hot home made pizza :)

pizza1

Note:

Use yeast that is active for best results.

Kneading the dough for atleast 20 mins is a must.

Do not knead too much after the dough raises. Just punch the air out and roll them into balls and flatten them.

pizza2

Tips:

You can cover and preserve the bread base in the refrigerator for at least a week.

Use exotic toppings like mushrooms, olives, broccoli etc while you make it for guests :)

pizza

Written by: Nithya
Send in your queries by clicking here.


Friday, September 30, 2011

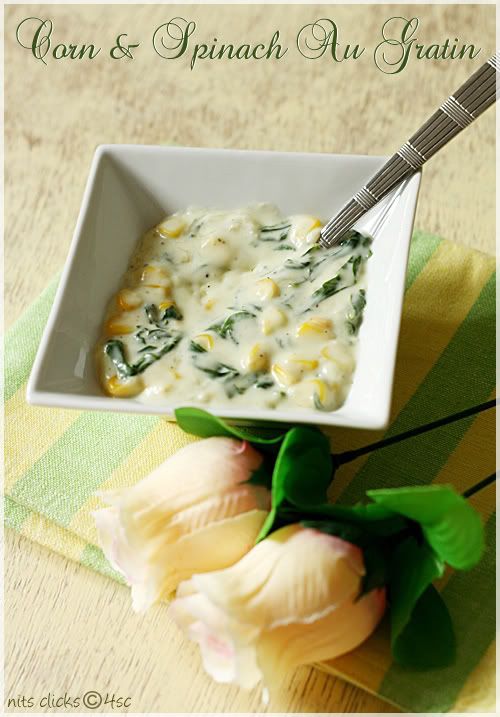
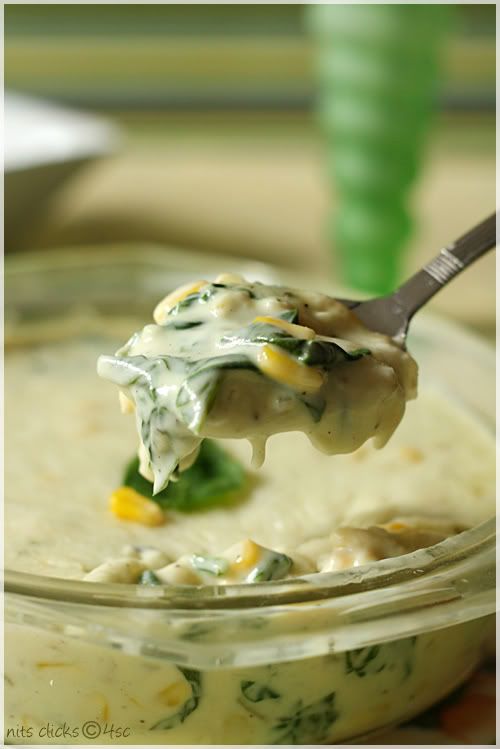
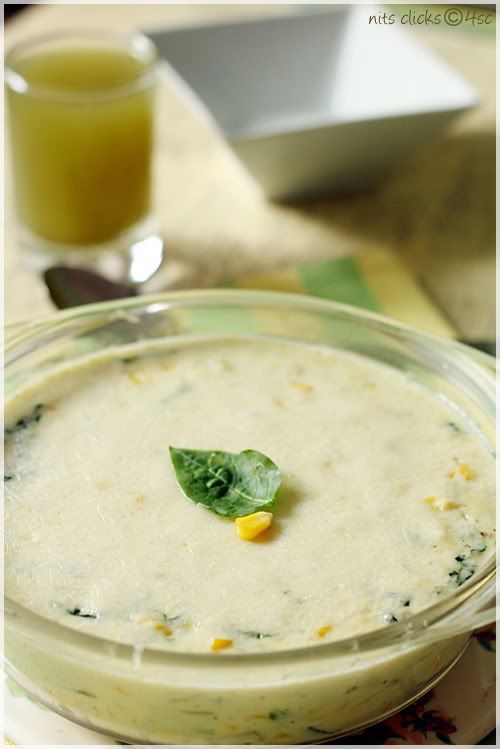
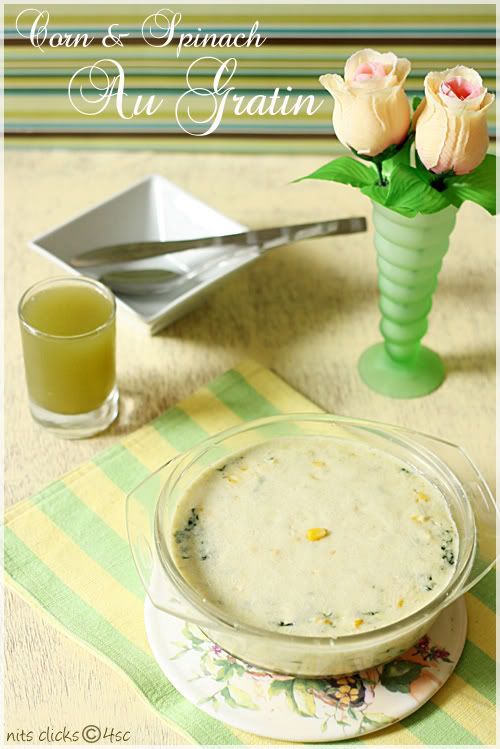
Corn & Spinach Au Gratin

Augratin1

Cheesy and creamy Au Gratin is one of my favorite dishes when it comes to multi-cuisine food.

Au Gratin has its origin in French cuisine and is usually prepared in a shallow dish. It is baked or cooked under an over head grill or broiler to form a golden crust on top and is traditionally served in its baking dish.

Oops... Am I not indulging on a lot of fat these days!!! :( Got to watch my waist line!! Oh.. come on its after all yummy food and why resist on them for such reasons. Indulge sinfully and work out sincerely to keep yourself fit. Waaa What a Gyan!! :P

Augratin2

Ingredients:

Spinach chopped (palak) – 1 cup
Sweet corn kernels – 1 cup
Garlic – 2 pods
Onion – 1
Olive oil – 2 tsp
Pepper powder – 1/2 tsp
Oregano powder – 1/2 tsp
Salt – for taste
Mozzarella Cheese – 3/4 cup

For white sauce:

All purpose flour (Maida) – 4 tbsp
Butter – 4 tbsp
Milk – 3 cups

Augratin5

Method:

To make white sauce - Dilute the maida in milk and mix it thoroughly without lumps. Melt the butter in a pan. Simmer the stove, pour in the diluted milk mixture and stir continuously until the sauce thickens. Finally add salt and mix well.

Chop onion and garlic finely. Steam the corn and remove kernels.

Heat olive oil in a pan, add the chopped onion and garlic and sauté till they turn light brown.
Add the chopped spinach and corn and cook on medium flame for 4 to 5 minutes. Add salt, pepper and oregano and mix well. Now add the white sauce and cook for 5 minutes.

Transfer this to a baking dish and sprinkle the rest of the grated cheese on top and grill in an oven till the cheese melts down.

Corn and Spinach Au Gratin is ready :)

Serve hot and enjoy eating :)


Augratin

Tips:

You can use mashed potato instead of corn.

You can grill the Au Gratin a little more until the cheese slightly browns on top. It gives a rustic flavor.

Augratin3

Written by: Nithya
Send in your queries by clicking here.


Monday, September 26, 2011

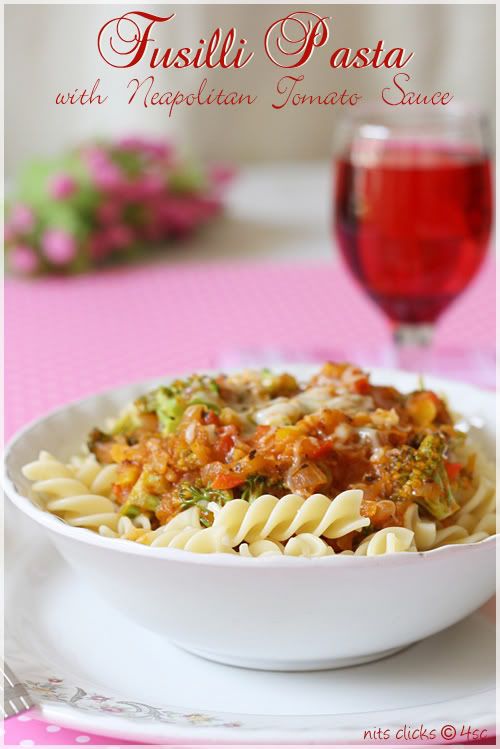
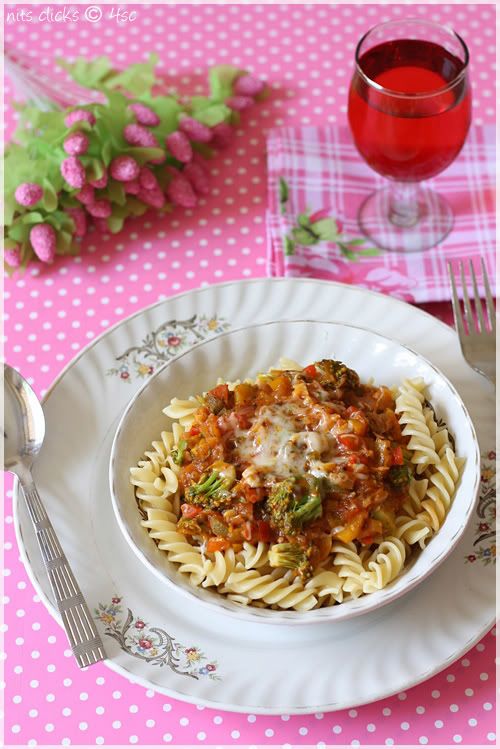
Fusilli Pasta with Neapolitan Tomato Sauce

fusilli pasta

Pasta is one of my most favorite Italian dish and I enjoy all forms and shapes of them :) Be it with a white sauce or a tomato base, they are just yummy!! :)

Neapolitan sauce is also known as Marinara sauce in the US and is a quick version of tomato based sauce which goes really well with pastas. The flavor of basil would make it simply delicious :)

The addition of colorful and healthy veggies make it more interesting and yummilicious :)

fusilli pasta3

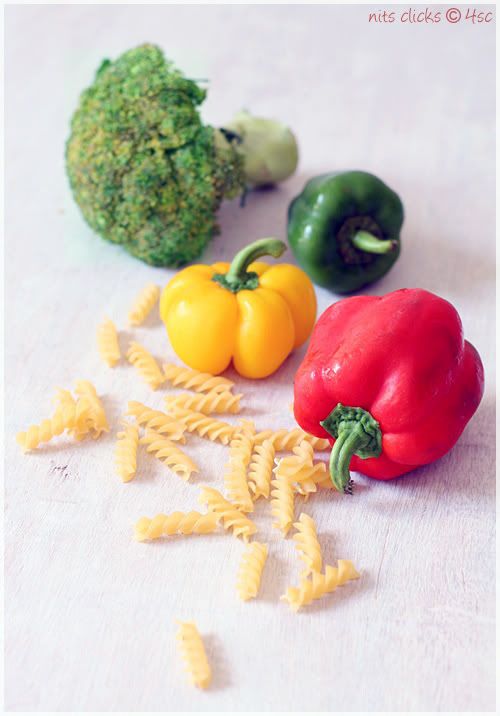
Ingredients:

Fusilli pasta - 2 cups
Broccoli
Green bell pepper - 1/2
Yellow bell pepper - 1/2
Red bell pepper - 1/2
Tomatoes - 6
Garlic - 3 pods
Paprika - 1 tsp
Pepper powder - 1 tsp
Chilly flakes - for taste(optional)
Basil herb - 1 tsp (or use 1/2 cup fresh basil)
Salt - for taste
Olive oil
Mozzarella cheese - 1/2 cup

fusilli pasta5

Method:

Heat 4 cups of water with a tsp of salt in a pan and add the pasta to it. Boil until the pasta is well cooked. Drain the pasta and rinse in fresh cold water. Keep aside.

Choose well ripen tomatoes. Make slits in the tomatoes and blanch them in hot water for 3 mins. Peel the tomatoes, discard their skin, remove seeds and puree them.

Split the broccoli florets and blanch them in hot water for three mins. Drain and keep aside.

Chop garlic finely. Dice bell peppers into small cubes.

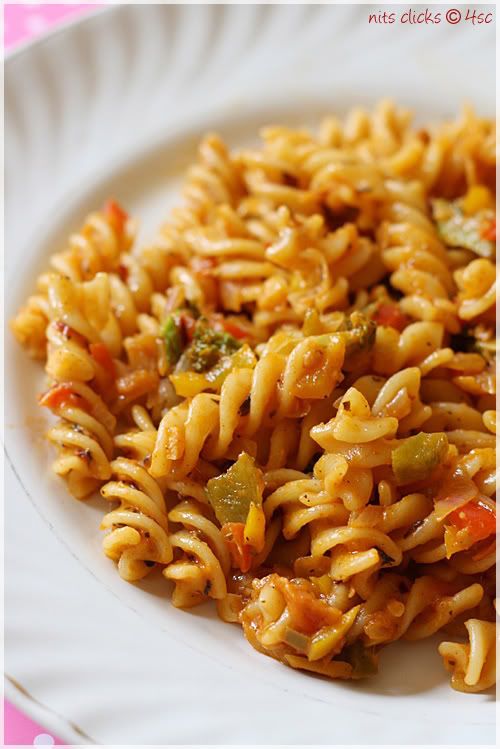
Take 3 tsps of olive oil in a pan and add the chopped garlic. Add the bell peppers and fry for two mins. Pour in the tomato puree and add the basil, pepper powder, paprika, chilly flakes and salt to it. Allow this to boil until the sauce becomes thick. Add the broccoli and give a stir. To this add the cooked pasta and grated cheese. Toss gently and serve hot :)

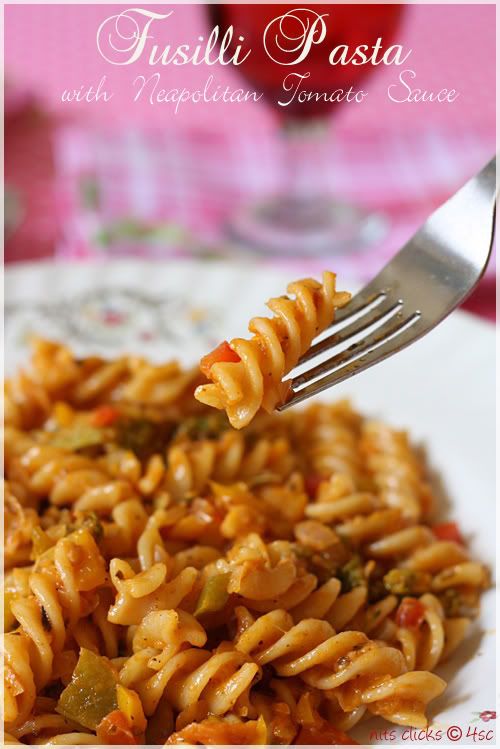
Enjoy the mouth watering fusilli pasta :)

fusilli pasta2

Tips:

Adding vegetables is purely optional. You can keep it simple with just the tomato sauce base.

You can grate some cheese on top and microwave it for few mins before serving for a cheesy pasta :) oops sinful pasta!! :P

fusilli pasta4

I bet you would lick your plate clean :P

fusilli pasta1

Written by: Nithya
Send in your queries by clicking here.

Thursday, August 5, 2010

Mexican Chilli Relleno

Mexican Cilli Rellenos1

Mexican cuisine has attracted me too much lately and I have been craving for tortillas and variety of salsas. :)

The hunger for Mexican food increased after I attended a 3 hour work shop of the cuisine conducted by Chef Suresh Thampan of Courtyard Marriott. He was truly professional in what he taught and gave us a lot of tips about the cuisine. Sweet pepper and red bean soup, Tortilla salad, Caesar salad, Chilli Relleno, Quesadillas and Spinach Enchiladas were the menu of the day :)


A glimpse of the workshop that I attended few weeks back :)

The chile relleno which means "stuffed chilli", is a dish that originated in the city of Puebla. It consists of a roasted fresh poblano pepper (a mild chili pepper named after the city of Puebla), sometimes substituted with non-traditional Hatch green chile or even jalepeno chili pepper. It is stuffed with cheese, or picadillo meat made of diced pork, raisins and nuts, covered in an egg batter or simply corn masa flour and fried. Although it is often served in a tomato sauce, the sauces can vary.

This vegetarian version of the mexican chilli relleno is truly sinful with lots of cheese and deep frying involved. But the taste is incomparable. Lip smacking is the right word I believe ;)

Mexican Cilli Rellenos6

Ingredients:


Large chillies (Bajji molaga/ Poblano pepper / Chili pepper) - 6
Cottage Cheese (Paneer) - 120 gms

Cheddar Cheese - 60 gms

Mixed herbs (thyme / oregano / Mixed) - for taste

Salt - for taste

Mexican Cilli Rellenos4

Method:

Slit the chilly neatly from top to bottom and deseed it using a spoon. Rinse them in cold water and keep them aside.

Grate required amount of cottage cheese as well as cheddar cheese. Put them in a bowl, add herbs and just a pinch of salt. Mix them well.


Now stuff just enough of cheese mixture into the chillies. Shallow fry them on a flat pan until the chilly gets roasted. Slightly turn them in intervals to get the sides of the chilly cooked. Do not turn upright. Remove them from the pan once it gets roasted on three sides.


Garnish with pineapple salsa. Serve them with tomato sauce and sour cream.


Hot and cheesy mexican relleno is ready :)


Enjoy making and happy eating :)
Mexican Cilli Rellenos

Note:


The more sinful version is to make a batter of all purpose flour, salt and water and dip the stuffed chillies in them and roll them on bread crumbs. Then deep fry the batter coated chillies to make crispy relleno.

Mexican Cilli Rellenos3

Written by: Nithya
Send in your queries by clicking here.

Popular Posts

Flickr Photostream

www.flickr.com
nits food clicks' items tagged with nitsclicks More of nits food clicks'
Featured on Baking is Hot
my foodgawker gallery
Foodista Drink Blog of the Day Badge