Friday, September 30, 2011

Corn & Spinach Au Gratin

Augratin1

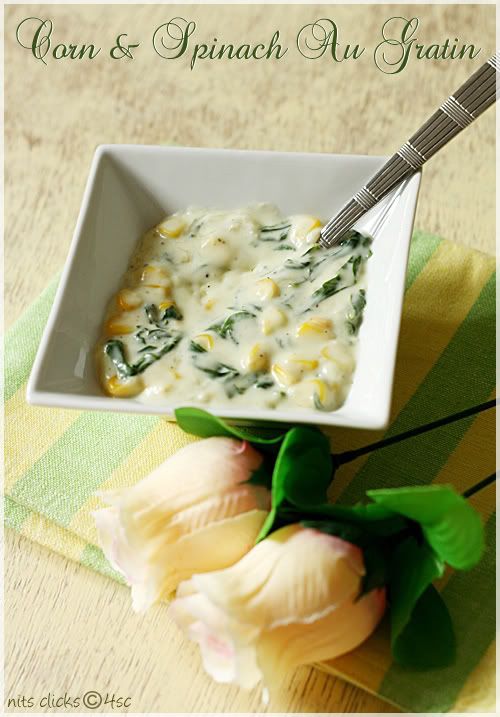
Cheesy and creamy Au Gratin is one of my favorite dishes when it comes to multi-cuisine food.

Au Gratin has its origin in French cuisine and is usually prepared in a shallow dish. It is baked or cooked under an over head grill or broiler to form a golden crust on top and is traditionally served in its baking dish.

Oops... Am I not indulging on a lot of fat these days!!! :( Got to watch my waist line!! Oh.. come on its after all yummy food and why resist on them for such reasons. Indulge sinfully and work out sincerely to keep yourself fit. Waaa What a Gyan!! :P

Augratin2

Ingredients:

Spinach chopped (palak) – 1 cup
Sweet corn kernels – 1 cup
Garlic – 2 pods
Onion – 1
Olive oil – 2 tsp
Pepper powder – 1/2 tsp
Oregano powder – 1/2 tsp
Salt – for taste
Mozzarella Cheese – 3/4 cup

For white sauce:

All purpose flour (Maida) – 4 tbsp
Butter – 4 tbsp
Milk – 3 cups

Augratin5

Method:

To make white sauce - Dilute the maida in milk and mix it thoroughly without lumps. Melt the butter in a pan. Simmer the stove, pour in the diluted milk mixture and stir continuously until the sauce thickens. Finally add salt and mix well.

Chop onion and garlic finely. Steam the corn and remove kernels.

Heat olive oil in a pan, add the chopped onion and garlic and sauté till they turn light brown.
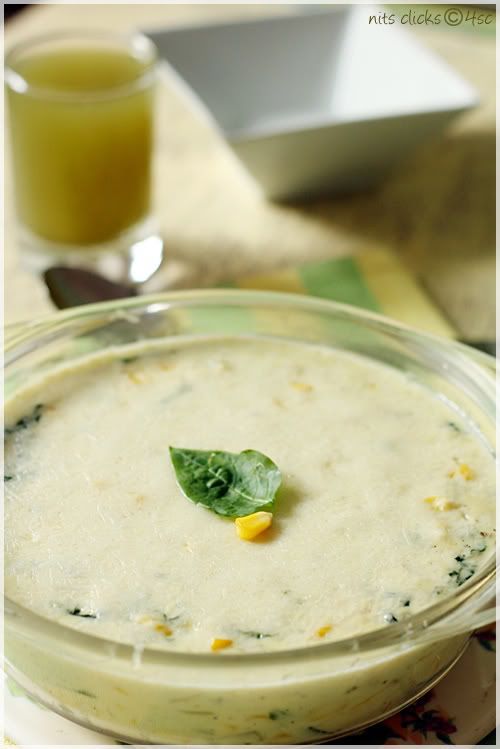
Add the chopped spinach and corn and cook on medium flame for 4 to 5 minutes. Add salt, pepper and oregano and mix well. Now add the white sauce and cook for 5 minutes.

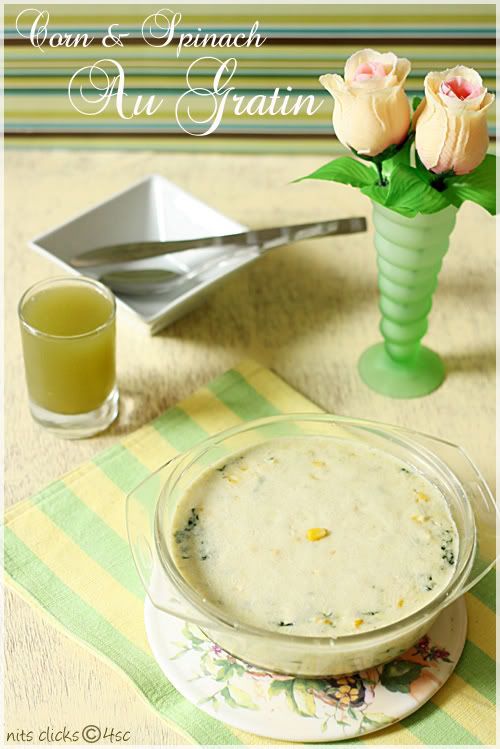
Transfer this to a baking dish and sprinkle the rest of the grated cheese on top and grill in an oven till the cheese melts down.

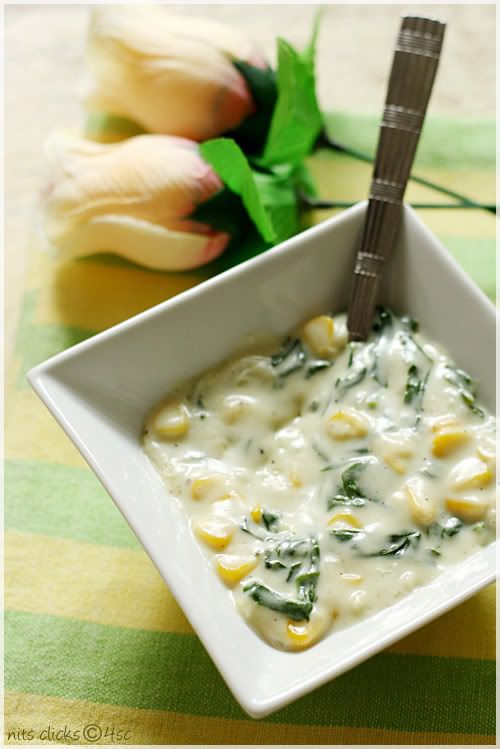
Corn and Spinach Au Gratin is ready :)

Serve hot and enjoy eating :)


Augratin

Tips:

You can use mashed potato instead of corn.

You can grill the Au Gratin a little more until the cheese slightly browns on top. It gives a rustic flavor.

Augratin3

Written by: Nithya
Send in your queries by clicking here.


Monday, September 26, 2011

Fusilli Pasta with Neapolitan Tomato Sauce

fusilli pasta

Pasta is one of my most favorite Italian dish and I enjoy all forms and shapes of them :) Be it with a white sauce or a tomato base, they are just yummy!! :)

Neapolitan sauce is also known as Marinara sauce in the US and is a quick version of tomato based sauce which goes really well with pastas. The flavor of basil would make it simply delicious :)

The addition of colorful and healthy veggies make it more interesting and yummilicious :)

fusilli pasta3

Ingredients:

Fusilli pasta - 2 cups
Broccoli
Green bell pepper - 1/2
Yellow bell pepper - 1/2
Red bell pepper - 1/2
Tomatoes - 6
Garlic - 3 pods
Paprika - 1 tsp
Pepper powder - 1 tsp
Chilly flakes - for taste(optional)
Basil herb - 1 tsp (or use 1/2 cup fresh basil)
Salt - for taste
Olive oil
Mozzarella cheese - 1/2 cup

fusilli pasta5

Method:

Heat 4 cups of water with a tsp of salt in a pan and add the pasta to it. Boil until the pasta is well cooked. Drain the pasta and rinse in fresh cold water. Keep aside.

Choose well ripen tomatoes. Make slits in the tomatoes and blanch them in hot water for 3 mins. Peel the tomatoes, discard their skin, remove seeds and puree them.

Split the broccoli florets and blanch them in hot water for three mins. Drain and keep aside.

Chop garlic finely. Dice bell peppers into small cubes.

Take 3 tsps of olive oil in a pan and add the chopped garlic. Add the bell peppers and fry for two mins. Pour in the tomato puree and add the basil, pepper powder, paprika, chilly flakes and salt to it. Allow this to boil until the sauce becomes thick. Add the broccoli and give a stir. To this add the cooked pasta and grated cheese. Toss gently and serve hot :)

Enjoy the mouth watering fusilli pasta :)

fusilli pasta2

Tips:

Adding vegetables is purely optional. You can keep it simple with just the tomato sauce base.

You can grate some cheese on top and microwave it for few mins before serving for a cheesy pasta :) oops sinful pasta!! :P

fusilli pasta4

I bet you would lick your plate clean :P

fusilli pasta1

Written by: Nithya
Send in your queries by clicking here.

Wednesday, September 21, 2011

Tender Coconut Soup

Tender coconut soup2

Tender coconut in soup!!!! Yup, I came up with this idea when I was craving for a soup this afternoon :) The flavor is evident and different from a clear soup.

This soup has natural sweetness of tender coconut water and the chunks of veggies and tender coconut make it so delicious and filling. I bet you would love it! :)

Tender coconut soup

Ingredients:

Tender coconut (Elani) - 2
Carrot - 1
Garlic - 2 pods
Ginger - small piece
Corn flour - 2 tblsp
White pepper powder - for taste
Salt - for taste
Coriander leaves

Tender coconut soup1

Method:

Break open the tender coconut and collect the water in a cup.

Scrap out the tender coconut and dice them into small squares and keep it aside.

Peel and dice carrot into small cubes. Chop garlic and ginger finely too.

Take a tsp of oil in a pan and drop in the chopped ginger, garlic and carrot pieces and fry for a min. Sprinkle some water and close the pan with a lid for the vegetables to get cooked. Once done, pour in the tender coconut water and allow it to boil.

Take the corn flour in a small bowl and dilute it with 2 tblsp of water.

Pour the diluted corn flour syrup to the boiling soup while stirring continuously. Simmer the flame and allow it to boil for few more mins. Add salt and the reserved tender coconut squares to the soup and give a stir.

Sprinkle white pepper and finely chopped coriander leaves and serve hot.

Enjoy a very different soup :)

Tender coconut soup3

Tips:

Add the coconut pieces only after removing the soup from flame.

You can add more veggies like beans etc to the soup.

Tender coconut soup4

Written by: Nithya
Send in your queries by clicking here.

Monday, September 19, 2011

Walnut Coffee Frappe

walnut coffee frappe

Monday morning drink and the post of the day are the key factors that make my week going. I need a perfect start to keep myself pepped up for the week ahead :)

There were loads of recipes running in my mind this morning and I had enough josh to try something new, but then my pantry was almost empty with just few ingredients :( I did some mind cooking with the ingredients that were available and came up with this super duper delicious cold coffee frappe :) All thanks to Mocha's menu that had such exotic combinations :)

I'm sure you would lick the glass just as I did :P

walnut coffee frappe1

Ingredients:

Walnuts - 7
Instant coffee powder - 1 tsp
Chocolate chips - 2 tsp
Vanilla ice cream - 2 scoops
Milk - 1 cup
Vanilla essence - 1 tsp
Honey - 3 tsp

walnut coffee frappe2

Method:

Drop the walnuts in the blender and powder it finely.

Add milk, chocolate chips, vanilla ice cream, vanilla essence, instant coffee powder and honey to it and blend well until creamy and smooth.

Serve chill topped with a dollop of fresh cream and chocolate sprinkles.

Slurp!!! enjoy :)

walnut coffee frappe3

Tips:

Skip milk to make the frappe thicker and rich.

Add more of coffee powder for stronger flavor.

walnut coffee frappe4

Written by:
Nithya
Send in your queries by clicking here.

Friday, September 16, 2011

Five Lakh Hits - A Surprise Celebration!

five lakh

I'm excited, happy, proud and thankful to announce that my little passion - "4th Sense Cooking" has reached the mark of 500000 hits!! :)

The more number of zeros, the more the bliss is!! :)

I'm still a kid at the kitchen anxiously waiting to taste the experiments that I make and jump in joy when it is a success and cry over it when it fails. But my parents, blogger buddies, friends and visitors have never missed to encourage me on any day. What more can I ask for?!!

I would like to take this occasion to wholeheartedly thank all of you who have been here and have motivated me to go on with my passion :) Thank you so much :)

My little blog reached the big number last day. The realization was even more exciting since it was announced to me by my beloved fiance :) The celebration dint stop with wishes, but came in the form of a beautiful surprise, I mean a 'BEAUTIFUL' cake in the night to mark the day as one of the most memorable one :)


Wednesday, September 14, 2011

Balloon Vine Pancake / Mudaikathan Keerai Dosa

Balloon vine pancake1

Its a well known fact that food acts as medicine and its important to include ingredients such as greens in our weekly diet plans to keep fit.

Balloon Vine / Mudaikathan keerai is one such greens which is absolutely healthy and is proved to cure joint pains.

I still remember the childhood days when we used to pick these greens and pop the balloon seeds on each others forehead and play :P This time I picked up some greens fresh from the garden when I visited my native a couple of weeks back and tried to make green pancakes with them. They looked pretty attractive and were tasty too. So here is yet again a healthy dish from my kitchen for you all :)

Balloon vine pancake4

Ingredients:

Balloon Vine greens / Mudaikathan Keerai - 2 cups
Par boiled rice - 2 cups
Green chillies - 3
Curd - 1 cup
Salt - for taste

Balloon vine pancake2

Method:

Soak rice in water for atleast two hours.

Clean the greens and measure two cups full.

Grind soaked rice along with greens, chillies, curd and salt into a fine batter.

Allow this batter to ferment over night.

Add enough water to the batter to make it into pouring consistency(just like rava dosa batter). Heat the skillet and pour a ladle full of batter starting from the edges in a circular way. Since the batter is loose it will automatically fill the middle portion. Add a spoon of oil to roast it. Turn the dosa and roast it on the other side too.

Serve hot with garlic or onion chutney.

Enjoy making a healthy dish :)

Balloon vine pancake

Tips:

Click here for recipe of Garlic chutney and Onion chutney.

Use metal skillet for such dosas since non stick will not allow it to spread much.

You can replace the green with other varieties too.


Balloon vine pancake3

Written by: Nithya
Send in your queries by clicking here.


Saturday, September 10, 2011

Unni Appam - Onam Special

unniappam4

Wish you all a very happy Onam! :)

Hope you all had a great celebration this year!!

Oops!! sorry, I'm a bit late to post it this time. Blame the painting work going on at home. Its leaving me helpless. Making a dish was not a hard task, but clicking pictures of it was a super hard task with lots of men at work and dust flying all over the house. Anyways I'm happy to squeeze in a post to celebrate the occasion :)

unniappam3

Ingredients:

Rice flour - 2 cups
Maida - 1/2 cup
Jaggery - 1 1/4 cup
Water - 1 cup
Banana - 2
Cooking soda - A pinch

unniappam1

Method:

Take the rice flour, maida and Cooking soda in a large bowl.

Heat half a cup of water in a pan and add the jaggery to it. Mix well until the jaggery melts completely. Filter this to remove dirt. Pour this into the rice flour mixture and mix well.

Grind the bananas into a smooth paste by adding half a cup of water and add this to the above mixture too and mix until it forms a smooth batter. The consistency should be a little thicker than dosa batter.

Keep the batter untouched for 4 hours.

Heat the unni appam pan and grease the holes generously with oil. When the pan reaches moderate heat, spoon in the batter into the holes. When it gets roasted, scoop the appam with a spoon and turn it around and apply some ghee on top. Once it is roasted on all sides collect it on to the serving bowl.

Enjoy eating delicious unni appam :)

unniappam

Tips:

The color of the appam depends on the jaggery color. Use dark ones for best results.

The banana would give it a distinct flavor. But you can skip it and use cardamom flavoring too.

The cooking soda is added for making the appam a little soft. If you prefer firmer appam, then you can very well skip it.

unniappam2
Written by: Nithya
Send in your queries by clicking here.

Tuesday, September 6, 2011

Vanilla Pannacotta With Pomegranate Sauce

Pannacotta6

I'm being a busy bee lately!! oops its a little too much of work these days but I'm enjoying it :)

Pannacotta is an Italian delicacy which is just as yummy as possible. People who love jelly based puddings would go crazy for this for sure.

I took a break from other work and made this dessert last evening. After a couple of fumbles in the kitchen last week, I really had no patience to experiment much. So choose this recipe from Ria's collection and just made it as it is.


Pannacotta5

Ingredients:

Milk - 1 cup
Heavy Cream - 1 cup
Granulated sugar - 1/2 cup
Gelatin - 3 tsp
Cold Water - 2 tsp
Vanilla extract - 2 tsp

For sauce:

Pomegranate - 1
Sugar - 1 tblsp
Corn flour - 2 tsp
Water - 1 tblsp

Pannacotta7

Method:

Vanilla Pannacotta:

Pour in the milk,cream & sugar in a sauce pan and bring it to a boil. Remove it from flame.

Sprinkle the gelatin over cold water and let it bloom for 5 mins. Melt it in the microwave oven for 20 seconds. Remove and stir well.

Add the vanilla extract and melted gelatin into the milk and cream mixture and stir well.
Pour into desired moulds and let it set in the refrigerator for a minimum of 4 hours.

For Pomegranate Sauce:

Pulse the pomegranate seeds in the mixie and extract juice. Filter it completely to remove seeds.

Take the juice and sugar in a sauce pan and heat it on low flame.

Dilute the cornstarch in water and add it to the pan and cook on low flame until it thickens slightly.

Take off the flame and let it cool completely.

Demould the pannacotta on the serving plate and top it with pomegranate sauce and pomegranate seeds.

Enjoy eating a delicious and beautiful looking dessert.

Pannacotta1

Tips:

You can mix in some melted gelatin to the pomegranate sauce and set it on top of the dessert too.

Set it in a glass and serve it chill.

Use other seasonal fruits as topping too.

Pannacotta4

Lick lick lick the spoon!! yummy dessert to finish off any meal :)

Pannacotta

Written by: Nithya
Send in your queries by clicking here.


Saturday, September 3, 2011

Food Photography - Background and Properties

Hi All!!!

After all your encouragement and appreciation on my food presentation and photography skills, I wanted to share my little thoughts and secrets on how I go about doing it :)

Fortunately a month back Lubna of "
Yummy Food" asked me to do a guest post on her blog very much on my favorite topic being "colors and backgrounds used for food presentation". I grabbed the opportunity and did the post for her.

On friendly demand and for the sake of records, I'm reposting it here for people who missed to go through :)


Here it goes....


I always believe that colors have the ability to bring a canvas to life. I enjoy playing with colors in my photographs.

Background

Background of an image is as important as the foreground or the subject as such. The dish that you make gets really highlighted only when the background is supportive and pretty.

There are various items that you can choose as backgrounds for you photograph
  • Colored charts
  • Hand made papers
  • Wall papers
  • Planks of wood roughly painted
  • Colorful napkins
  • Gift wrappers
  • A dining table as such
  • or even a simple Dhupatta or saree can do wonders to your photographs.
Photobucket
Colored charts that I use as background

Properties


A wonderfully cooked up curry which tastes amazing could look absolutely unappealing when presented in a cooker that it was made!!!(excuse exceptions) That is not what you want right??!!

Its not just the dish that gets one's attention to the pic. It could even be the serving bowl, or the flowers used at the background or even a simple napkin could grab the attention. So do concentrate on all the properties on the setup to make it a beautiful pic on the whole.

Photobucket

I choose colorful bowls and plates that suit the dish and highlight it very well. Plastics, ceramics or glass!! what ever they are made of have their own attraction quotient definitely :)

Flowers never fail to make us smile :) Choose pretty flowers that compliment your dish as backdrops.

Photobucket

Now comes the most important and interesting part of the post - factors that help us choose the best backdrops and settings.

I go by following simple rules of colors or color theories that help us choose the best schemes that pleases our eyes.

Monochromatic Color Scheme:

Monochromatic color schemes are derived from a single base color and extended using its shades, tones and tints.

Using one single color in the picture from its lightest shade to the darkest can keep the focus on the subject color and would register in the viewers mind easily.

Simply go ahead choosing background and properties of the same color of the dish :)

Monochromatic

Example:

I have used only shades of yellow as the main color and have extend to its lightest shade being white in mango yoghurt parfait picture below.

Monochromatic 1

Complementary Color Scheme:

Complimentary colors are colors that are opposite to each other on the color wheel.

Complementary color schemes have a more energetic feel. The extreme contrast between the colors creates a vibrant and fresh look.

complimentary

Example:

I have used Purple and Orange as prominent colors which are complimentary to each other and highlight the picture.

The vibrancy is phenomenal when such opposite colors are used.

complimentary1

Analogous color scheme:

Analogous colors are colors that are adjacent to each other on the color wheel. Analogous color schemes are pleasing to the eye. They usually match well and create serene and comfortable photographs.
Analogous

Example:

I have used Yellow, Orange and Green in this picture that blends well and gives a pleasing effect.

Analogous1

Bi-Color and Tri-Color:

Restricting the number of colors in a picture to two or three result in extremely pleasing pictures.


Example:


I have kept it simple and classic by choosing background and properties of just two colors(yellow and brown) in the first pic and three colors(Yellow, pink and green) in the second photograph.

bi and tri

Apart from having such colored backgrounds you could simply choose to have nature as the background at times too. The photos give a very pleasing and homely appearance when they are shot next to a window :)

Example:

The apple tea photograph below was shot next to a large window. The blurred trees at the backdrop give it a nice tropical look isn't it?!!!

natural background

Saying all that, we can also have simple vegetable or fruit carvings as our properties too.

Use the prominent veggi or fruit used in the dish to carve out simple flowers or creatures and place them next to the dish. You would score extra points for this from your viewer :) It shows your creativity and also enhances the presentation factor of the picture.

Example:

I have carved out frogs from green bell peppers and used it as a property to decorate my Bell pepper rice.

carving background

The aim of food photography is to make people drool, so keep clicking photographs with different backgrounds and settings until you reach your goal :)

Food photography involves a huge scope of creativity and I have realized it in the two years I have been blogging. The best way to learn is to try and keep on trying different things.

Enjoy clicking :)

Written by: Nithya
Send in your queries by clicking here.


Popular Posts

Flickr Photostream

www.flickr.com
nits food clicks' items tagged with nitsclicks More of nits food clicks'
Featured on Baking is Hot
my foodgawker gallery
Foodista Drink Blog of the Day Badge